

Using the Panopto Automated Scheduling Tool
- Pedagogic reasons e.g. teaching style or activity unsuitable for recording.
- Legal, ethical, or privacy reasons e.g. sensitive content.
- Personal reasons e.g. uncomfortable with recording.
- Alternative recording arrangements e.g. where you plan to record the session using another platform (such as Microsoft Teams) or your own device, rather than the University’s automated Panopto recording system.
This page explains how to use the Scheduling Tool to review, manage, and opt out of automated lecture recordings.
Watch the Video Walkthrough
Before following the step-by-step instructions below, watch this short demonstration of the Scheduling Tool in action:
powered by Advanced iFrame
View the Scheduling Tool demo on Panopto
Key Points to Remember
- Only classes labelled as a Lecture (LT) in the central timetabling system are eligible for automated recording. Other teaching formats are excluded.
- Schools are responsible for ensuring timetabling data is accurate and kept up to date.
- Recording settings can be applied either to an entire lecture series or to individual lectures within a series.
- Where a Canvas course has multiple Teachers (e.g. team teaching arrangements), the Partially Automated setting must be used when managing recording settings for individual lectures.
- In most cases, lecturers are responsible for managing their own recording settings. However, staff with a Teacher, TA, or Designer role in QSIS can also manage recording settings for a module.
- Recording settings can be changed up to one hour before the scheduled lecture start time. However, staff are encouraged to review and manage their settings before the start of each semester to ensure recordings are configured correctly.
Step-by-Step Instructions
- Log in to Queen’s Online
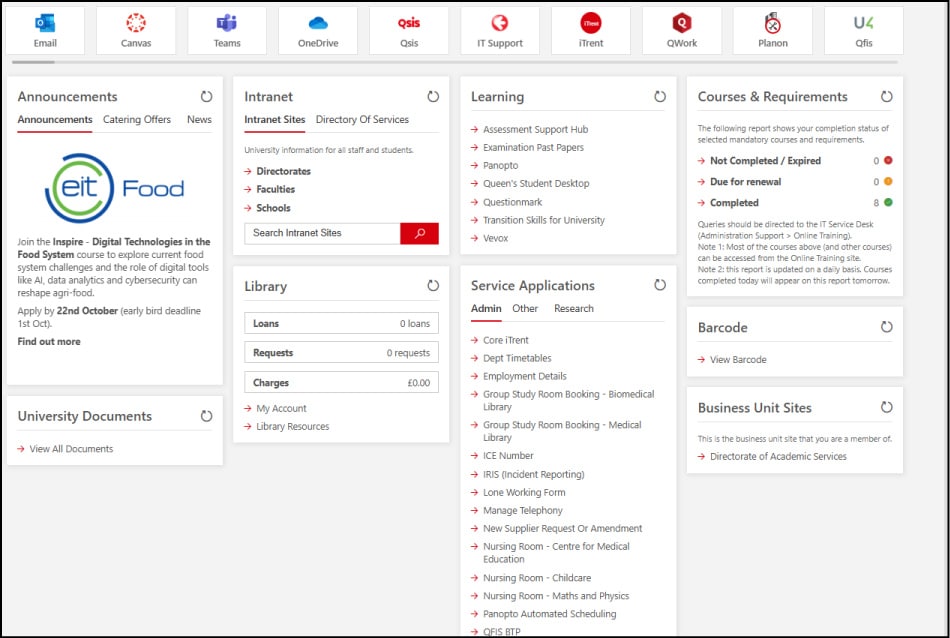
- Go to Service Applications → Admin Tab → Panopto Automated Scheduling.
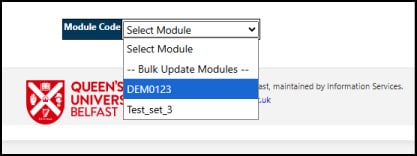
- Select your module: Choose your module from the drop-down menu.
Can't find your module? Log in to Panopto (http://qub.cloud.panopto.eu/) and then return to the Scheduling Tool. This will help synchronise your module list.
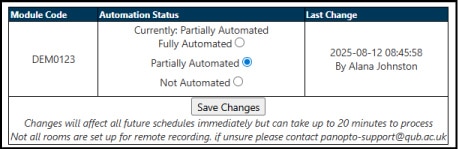
- Choose an automation setting: Under Automation Status, select the option that best meets your needs and click Save Changes.
- Fully Automated - All lectures for this module will be recorded
- Partially Automated - Lets you choose which lectures are recorded and which are not
- Not Automated - Turn off recording for all lectures in this module
⚠️ Important: If a module is taught by multiple staff members with different recording preferences, select Partially Automated. This allows individual lectures to be managed separately and helps avoid accidentally overriding settings applied by colleagues.
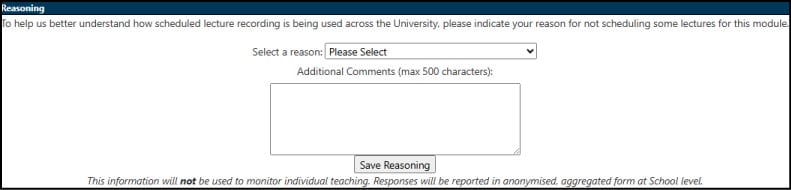
3. Provide a reason (if applicable): If you select Partially or Not Automated, you will be asked to provide a reason. Select an option from the drop-down menu and/or provide additional details in the text box, then click Save Reasoning.
Providing this information helps the University understand barriers to lecture recording and identify where additional guidance or support may be needed.
4. Customise individual lectures (Partially Automated only): If you selected Partially Automated, you can now manage recording settings for individual lectures. Once you have finished making changes, click Save Changes.
If you are teaching alongside colleagues, take care not to change settings for sessions that you are not responsible for.
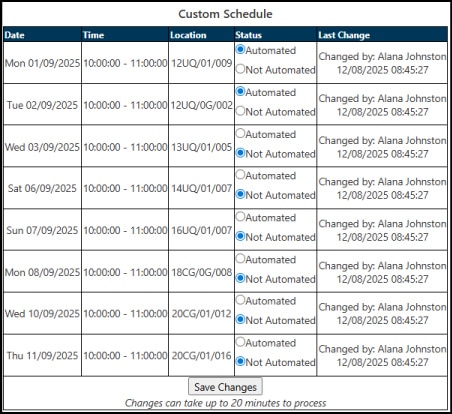
5. Repeat for other modules: Repeat the process for any other modules you teach.
Need Help?
Queries about using the Scheduling Tool can be directed to Panopto Support:

