
Video files that you have created can be uploaded to MS Stream and then embedded on your Canvas course by following the steps below:
Instructions
Step 1: Log into your Microsoft 365 account and select 'Stream' (you may need to look in 'Other Apps' if you don't see it).
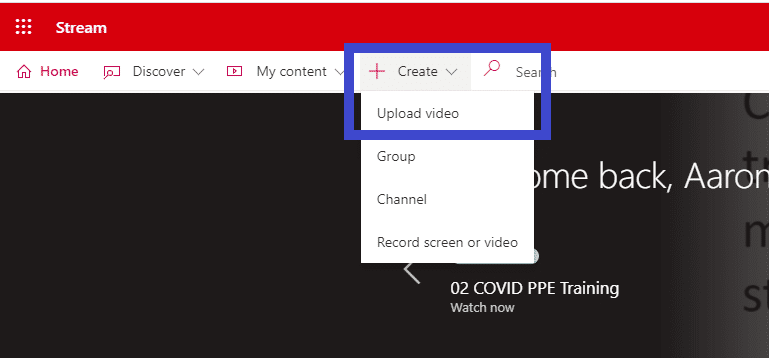
Step 2: On the top left of your screen select 'Create' then 'Upload video' (see image below) and select or drag the video from your computer.
Step 3: Edit the 'Details' and in the permissions tab, set the appropriate permissions for your video to allow students/staff to view it. (Note: The permissions must be set on any video uploaded to MS Stream to allow students to view it. If this is not done then students will be unable to view your video. MS Stream allows you to go to the video settings and select the group of students (those on your module) that you wish to be able to see your video. Watch this short video from Dr Dan Corbett showing you how to do this.)
Video Instructions
https://youtu.be/qoAKJGGFef4
Once you have your video uploaded to MS Stream you can embed it in your Canvas course by following the steps below.
Instructions
Step 1: Go to the video in MS Stream and select 'share' then and the 'embed' tab (see image below). Toggle the responsive button from off to on.
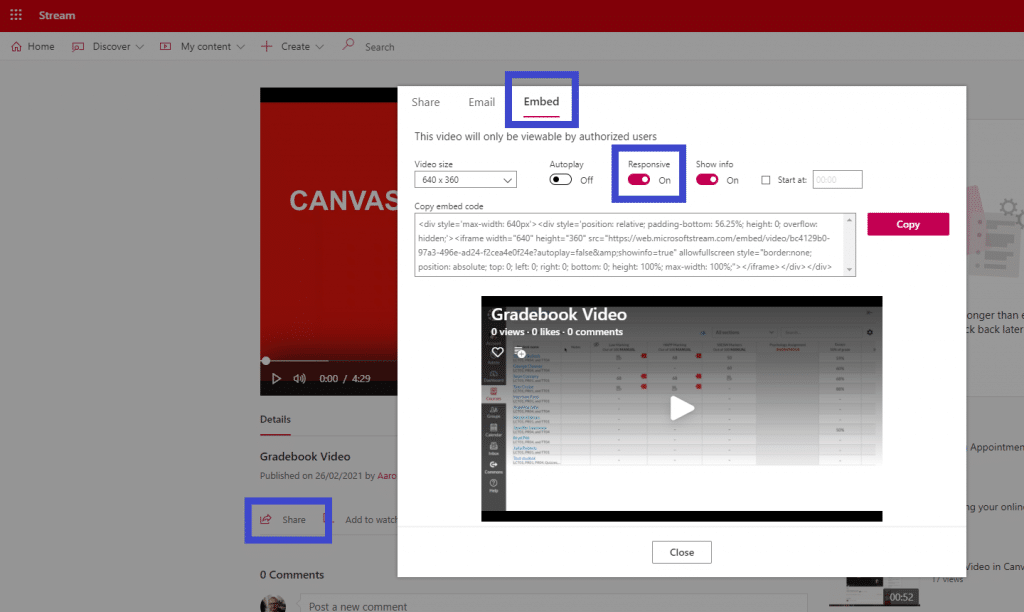
Step 2: Select 'Copy' to copy the embed code.
Step 3: Navigate onto the Canvas page where you want to embed the video and select 'edit'.
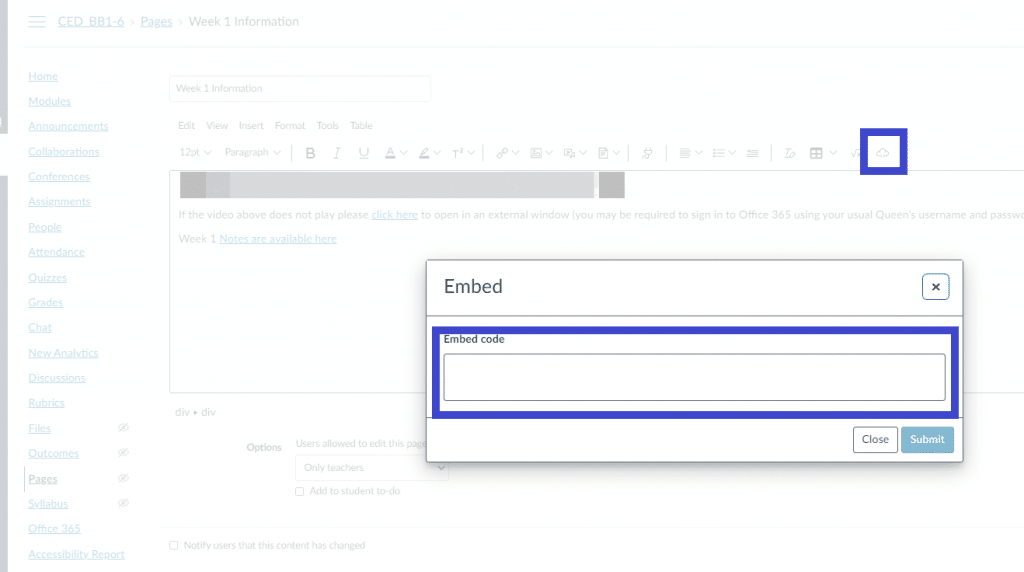
Step 4: Place your cursor on the correct location on the page, select the cloud icon on the far right of the toolbar and paste the embed code from the MS Stream video in the pop-up window (see image below).
Video Instructions
https://youtu.be/yBEdQ3wExLQ
You can turn your narrated Powerpoint presentation into a video file that can then be uploaded into MS Stream and embedded into Canvas as outlined above.
To see how to create the presentation see the 'Connected Learning at Queens' Canvas course.
Instructions
Step 1: When you have created your presentation select 'File' then 'Export' and 'Create a Video' (see image below)
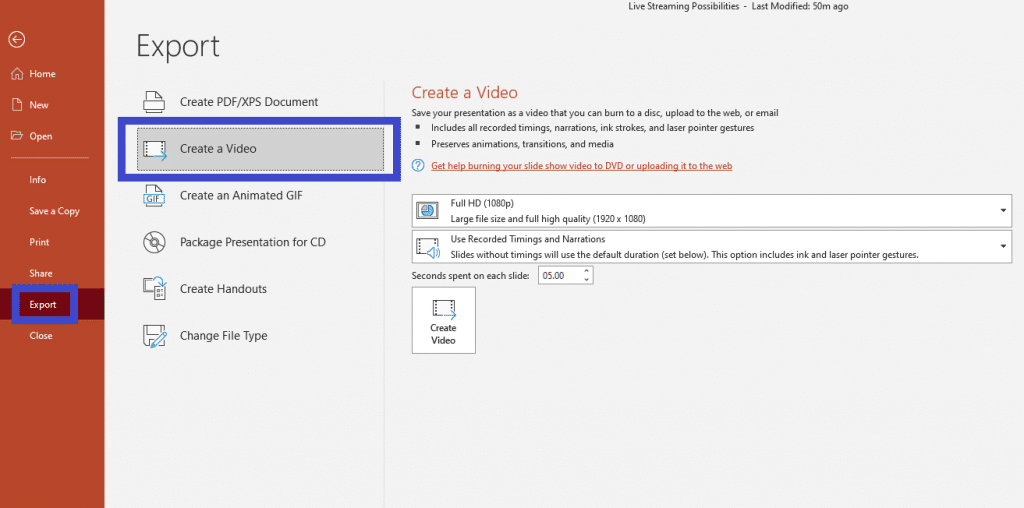
Step 2: Set the video Quality as 'HD 720' as well as your slide timing settings then 'Create Video' giving it a name and saving it to your computer.
Step 3: Follow the instructions above to upload to MS Stream and embed in Canvas.
Video Instructions
https://youtu.be/-Uu0zD5WihY


