Exchange 2007 Log Filesystem Full

The exchange log filesystems sometimes become full, usually as a result of a failure of the backup job to clear old log files. This will result in dependent databases being taken offline. There are two solutions to this –

  1. Ask someone from the SAN team to extend the LUN that hosts the log files and then grow the volume on the Windows system. You should only do this if you want a permanent increase in the log filesystem size.
  2. Remove some of the log files to clear some space. Follow the advice at http://support.microsoft.com/kb/240145

Rendering Student Entries Invisible in the GAL

You would think that the AD entry Exchange attribute msExchHideFromAddressLists should hide an entry from the GAL if set to TRUE. However, if there are entries for the non-Exchange attribute ShowInAddressBook that will override the other setting. You need to use the Quest AD utilities to seek out and update the rogue entries where this is the case. The command string below did the job –

Get-QADUser -sizelimit 0 -searchroot ‘ads.qub.ac.uk/QUB/Student’ -Includedproperties showinaddressbook |where-object {$_.showinaddressbook -ne $null} |Set-QADUser -ObjectAttributes @{msExchHideFromAddressLists=”TRUE”;ShowInAddressBook=””}

Spam Assassin rules for ~

Recently I wanted to block a uri using a body-rule in SpamAssassin. The uri in question contained the ‘~’ symbol, and as this can be used as a regular expression, I thought I’d check to see if it needed to be escaped.

Testing this by escaping the character normally, by using ‘\’ didn’t work, so I tried not escaping it at all. This allowed me to block a uri with ‘~’ that I made up, and showed that this symbol does not need to be escaped.

Clamd and Iptables

Running Clam on a separate machine to our Mail Transfer Agent we needed to configure iptables to allow access to clam from those machines. Clamd listens for connections on port 3310 by default but appears to hand off to other ‘passive’ ports for each stream to scan. So allowing access to port 3310 was not enough.
In the /etc/clamd.conf file I uncommented the following lines:

StreamMinPort 30000
StreamMaxPort 32000

To restrict the ports which clamd would use and restarted clam with

/etc/init.d/clamd restart

Checking netstat with:

netstat -lntap | grep clam

I could see that clam was indeed now using ports 30000-32000 rather than the default of 1024-2048
So adding the following line to /etc/sysconfig/iptables allowed the machines in my class B network to make use of the clam service:

-A RH-Firewall-1-INPUT -m state –state NEW -m tcp -p tcp –dport 3310 –source 111.222.0.0/16 -j ACCEPT
-A RH-Firewall-1-INPUT -m state –state NEW -m tcp -p tcp –dport 30000:32000 –source 111.222.0.0/16 -j ACCEPT

Building an RPM Package (DansGuardian 2.10)

After putting together an RPM for DansGuardian v2.10.1.1 I thought I would make a few notes. The version of DansGuardian in the repositories is currently version 2.8 and the only other repo or rpm I could find was a 32-bit 2.10.  Why DansGuardian 2.10?

  • Content Scanning Support with Clamd or Kapersky
  • Regular Expressions to enforce Google Safe Search (without patching)
  • NTLM support

So I set about generating the rpm for version 2.10.1.1 for 64-bit CentOS. My CentOS version is 5.5. I found this IBM developer works article useful for guidance on creating RPMs. I also did this build with DansGuardian v2.8 already installed via yum so I was able to make use of the existing init.d and logrotate.d scripts.

cd /usr/src/redhat/SOURCES
cp /etc/init.d/dansguardian /usr/src/redhat/SOURCES/dansguardian.init-centos
cp /etc/logrotate.d/dansguardian /usr/src/redhat/SOURCES/dansguardian.logrotate-centos
wget http://dansguardian.org/downloads/2/Stable/dansguardian-2.10.1.1.tar.gz
cd ../SPECS
wget http://ftp.qb.com.au/pub/yum/SPECS/dansguardian-centos-clamav.spec

Edit the above spec file to reflect version 2.10.1.1 removing the %patch0 line and setting –enable-clamav=no \
or use the SPEC file listed below.

yum install clamd clamav-devel pcre-devel

Build the RPM – keep an eye out for errors and install dependencies as needed:

cd ..
rpmbuild -v -bb –clean /usr/src/redhat/SPECS/dansguardian-centos-clamav.spec

After compilation you should have an rpm in /usr/src/redhat/RPMS/x86_64 which you can install after removing the existing 2.8 version of dansguardian:

yum remove dansguardian
rpm -Uvh /usr/src/redhat/RPMS/x86_64/dansguardian-clamav-2.10.1.1-0.1.el5.clamav.0.95.x86_64.rpm

In order to make use of the clamd content scanning in dansguardian it may be necessary to to change the owner and group in /etc/dansguardian/dansguardian.conf to clamav & clamav.

The RPM I created is available here: dansguardian-clamav-2.10.1.1-0.1.el5.clamav.0.95.x86_64.rpm – just in case anyone else can make use of it. I make no warranties.
 
SPEC FILE:

# $Id: dansguardian.spec  2007-04-06 dpv $
# Upstream: Daniel Barron <author$dansguardian,org>

#
# What to change when you build a new version:
# Version – match upstream version
# Release – Usually this would stay the same if the version is changed.
#           It is only things NOT in the .tar.gz file that will cause a release number change.
# Packager – if desired
# Vendor – if desired
# Patch0 – could easily become obsolete if the upstream version has changed
# %files – if files are added or removed, this section needs to be updated accordingly
#

%define real_name DansGuardian

Summary: Content filtering web proxy
Name: dansguardian-clamav
BuildRequires: gcc-c++ zlib-devel pcre-devel
Requires: coreutils squid
License: GPL
Group: System Environment/Daemons
URL: http://www.dansguardian.org/
Version: 2.10.1.1
Release: 0.1.el5.clamav.0.95
Packager: Jonny McCullagh <webmaster@qub.ac.uk>
Vendor: Queens University Belfast

# all of these files must live in /usr/src/redhat/SOURCES
Source: dansguardian-%{version}.tar.gz
Source1: dansguardian.init-centos
Source3: dansguardian.logrotate-centos
#Patch0: dansguardian_gcc43.patch
BuildRoot: %{_tmppath}/dansguardian-%{version}-%{release}-root

%description
DansGuardian is a web filtering engine that checks the content within
the page itself in addition to the more traditional URL filtering.

DansGuardian is a content filtering proxy. It filters using multiple methods,
including URL and domain filtering, content phrase filtering, PICS filtering,
MIME filtering, file extension filtering, POST filtering.

%prep
%setup -q -n dansguardian-%{version}
#%patch0 -p0

%build
%{configure} \
        –enable-clamav=no \
        –enable-clamd=yes \
        –enable-email=yes \
        –enable-icap=yes \
        –enable-kavd=yes \
        –enable-ntlm=yes \
        –enable-pcre=yes \

%{__perl} -pi.orig -e ‘
                s|^(CHKCONFIG) =.*$|$1 = :|;
                s|^\tchown|#\tchown|;
                s|/usr/lib|%{_libdir}|g;
        ‘ Makefile

%{__make} %{?_smp_mflags}

%install
mkdir -p %{buildroot}/var/log/dansguardian/
#mkdir -p %{buildroot}/var/run
make install DESTDIR=%{buildroot}
%{__install} -D -m0755 %{SOURCE1} %{buildroot}%{_initrddir}/dansguardian
%{__install} -D -m0644 %{SOURCE3} %{buildroot}%{_sysconfdir}/logrotate.d/dansguardian
ln -s /etc/init.d/dansguardian %{buildroot}%{_sbindir}/rcdansguardian

%post
chown -R nobody /var/log/dansguardian
chkconfig –add dansguardian

%preun
if [ $1 -eq 0 ]; then
        /etc/init.d/dansguardian stop &>/dev/null || :

fi

%postun

%clean
%{__rm} -rf %{buildroot}

%files
%defattr(-, root, root, 0755)
%doc INSTALL README
%doc /usr/share/doc/dansguardian/*
%doc %{_mandir}/man?/*
%config %{_sysconfdir}/dansguardian/*
%config %{_sysconfdir}/logrotate.d/dansguardian
%dir /etc/dansguardian
%dir /usr/share/dansguardian
/usr/share/dansguardian/*
%{_sbindir}/dansguardian
%{_initrddir}/dansguardian
%{_sbindir}/rcdansguardian
%dir /var/log/dansguardian

%changelog
* Mon Nov 22 2010 Jonny McCullagh <webmaster@qub.ac.uk> – 2.10-1.1
– Update to DG stable release and built for x86_64

* Wed Mar 11 2009 Rick Saul <rpm@qb.com.au> – 2.10-0.3
– Update to DG stable release.

* Wed Sep 17 2008 Paul Gear <rpm@libertysys.com.au>  – 2.9.9.8
– Created CentOS version based on Don Vosburg’s SUSE spec file. See http://dansguardian.org/downloads/2/Beta/SUSE.txt
Text mangling with Grep, Sed and Awk

Just an example for future reference of text mangling on unix/linux making use of sed, awk, and grep on a CSV/text file containing names, email addresses etc delimited with a semi-colon ;

cat emailaddresses.csv | grep “@” | awk -F “;” ‘{print $1}’ | sort | uniq | tr [:upper:] [:lower:] | sed ‘s/\@mydomain\.tld\.uk/\ $ main/’ | sed ‘s/\@/ \$ /’ | sed ‘s/^/mj_DLMembers= /’ > processed.txt

So we cat (read out) the contents of our text file ’emailaddresses.csv’ (which I exported from a xls file using Open Office). This is passed through grep so I only get lines which contain the ‘@’ symbol, so only lines containing email addresses – just in case there is a line with column names at the top. We then use awk to cut each of the columns based on the delimiter (; in this case) and ask awk to print out the first column (our email address column).
After that we sort the email addresses into alphabetical order and remove any duplicates using uniq.
The tr (translate) command is used to convert any uppercase characters to lowercase.
Next I have used sed to search (sed ‘s/findthis/replacewiththis/’) each line for the string ‘@mydomain.tld.uk’ (escaping the symbols @ and .) When sed finds a match it replaces it with ‘$ main’ which is what I need for my mailing list. For any other email address other than ‘@mydomain.tld.uk’ I just want to replace the @ symbol with $ so I use sed again for that.
I also need to prefix each line with  ‘mj_DLMembers= ‘ so I use sed again, this time finding the start of the line (^) and placing the text string ‘mj_DLMembers= ‘ in there.
Finally I direct (>) the results of this chain of pipes and commands to the file ‘processed.txt’ where I can use it for my mailing list.

Enhancing ClamAV with Extra Signatures

We use ClamAV mainly for scanning incoming email for malware and phishing scams. ClamAV comes with a default database usually stored in /var/clamav or /var/lib/clamav . To get up-to-date malware definitions the following sources can be used:

Freshclam
The Freshclam binary should have been installed when you installed clamd and you should have a script /etc/cron.daily/freshclam which runs daily to update the clam definitions. If not, you could run freshclam or add a cronjob with:

/usr/bin/freshclam –quiet –datadir=”/var/clamav” –daemon-notify=”/etc/clamd.conf”

ClamNailer
The definitions from ScamNailer are aimed at stopping Spear Phishing attacks. There are definitions for SpamAssassin and Clam. Set up a cronjob to retrieve the defintion at http://www.mailscanner.eu/scamnailer.ndb There is a download which includes a Perl script for this purpose and you can run it e.g. every 4 hours as follows:

33 1-23/4 * * * /path/to/ClamNailer-1.01.pl > /var/log/clamav-ClamNailer.log

ClamAV Unoffical Sigs
Download the Update script (and config file) from http://sourceforge.net/projects/unofficial-sigs/
Amend the configuration file /etc/clamav-unofficial-sigs.conf and set the ss_dbs variable to include all the sources you want to use (depending on how aggressive you want to be – we had a few false positives in jurlbla.ndb):

ss_dbs=”
   junk.ndb
   jurlbl.ndb
   INetMsg-SpamDomains-2w.ndb
   phish.ndb
   rogue.hdb
   sanesecurity.ftm
   scam.ndb
   spamimg.hdb
   winnow_malware.hdb
   winnow_malware_links.ndb
   lott.ndb
   spam.ldb
   spear.ndb
   winnow_phish_complete.ndb
” 

Then on the final line set:

user_configuration_complete=”yes”

Set up a cronjob to run the script:

/usr/local/bin/clamav-unofficial-sigs.sh -c /etc/clamav-unofficial-sigs.conf > /var/log/clamav-unofficial-sigs.log 2>&1

MSRBL
The MSRBL definitions are probably included in your clamav-unoffical-sigs script but can be run seperately if desired.
The MSRBL definitions can be used by running a shell script like the following, periodically as a cronjob:

#!/bin/bash
# Info at http://www.msrbl.com
PATH_TO_CLAM_DB=/var/clamav
rsync rsync://rsync.mirror.msrbl.com/msrbl/MSRBL-Images-FULL-SoN.hdb $PATH_TO_CLAM_DB/MSRBL-Images-FULL-SoN.hdb
rsync rsync://rsync.mirror.msrbl.com/msrbl/MSRBL-Images-3M-R-SoN.hdb $PATH_TO_CLAM_DB/MSRBL-Images-3M-R-SoN.hdb
rsync rsync://rsync.mirror.msrbl.com/msrbl/MSRBL-Images-1M-R-SoN.hdb $PATH_TO_CLAM_DB/MSRBL-Images-1M-R-SoN.hdb
rsync rsync://rsync.mirror.msrbl.com/msrbl/MSRBL-SPAM-CR.ndb $PATH_TO_CLAM_DB/MSRBL-SPAM-CR.ndb
rsync rsync://rsync.mirror.msrbl.com/msrbl/MSRBL-SPAM.ndb $PATH_TO_CLAM_DB/MSRBL-SPAM.ndb
/etc/init.d/clamd reload

The following example will run this every 3 hours:

18 1-23/3 * * * /path/to/clam-update-MSRBL.sh > /var/log/clam-update-MSRBL.log

Atomic
Atomic Secured Linux offers some 30-day old signatures freely (up-to-date signatures require a subscription)
Create a script to download the database from:

http://downloads.prometheus-group.com/delayed/clamav/clamav/ASL-h.ndb

An example script might be:

#!/bin/bash
cd /var/clamav
wget http://downloads.prometheus-group.com/delayed/clamav/clamav/ASL-h.ndb
/etc/init.d/clamd reload

Then schedule it as a cron job.

40 7 * * * /root/scripts/getAtomicClamDefinition.sh > /var/log/getAtomicClamDefinition.log

White-list Domain in ClamAV SaneSecurity Database

The SaneSecurity domain blacklist is held in the file INetMsg-SpamDomains-2w.ndb. In our case this is located in the /var/clamav directory. We can white-list troublesome domains by adding their signature to the local.ign2 file. The signature lines are of the form INetMsg.SpamDomain-2w.bad_domain – you can grep the exact signature from the ndb file. When you add a signature you should reload the clamd databases using the command: clamdscan –reload

Microsoft Entourage Setup on Mac OSX

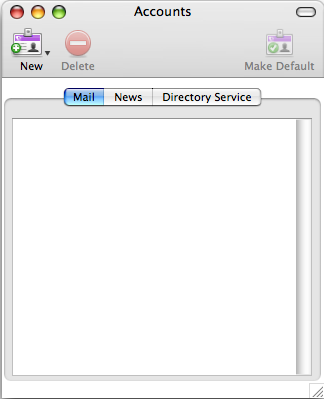
If you have not yet created any accounts the ‘Accounts’ dialog box (shown below) will open automatically when you lauch Entourage. If not choose it from Tools > Accounts.


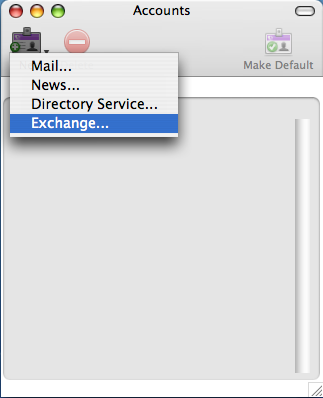
Click the ‘New’ button and select ‘Exchange’. (below)


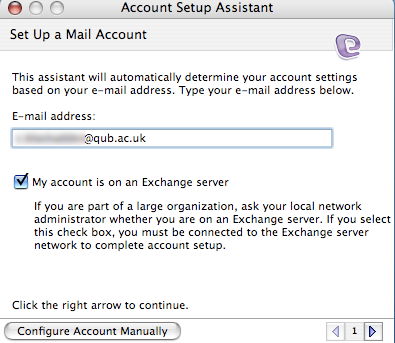
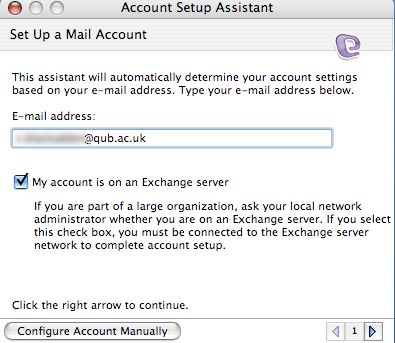
In the ‘Account Setup Assistant’ dialog box (shown below) type your email address and tick the ‘My account is on an Exchange server’ option then click the right arrow at the bottom to proceed to the next step.

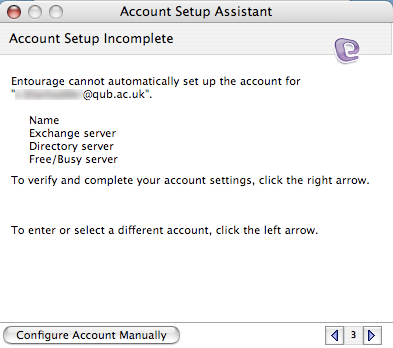
In the ‘Account Setup Assistant’ dialog box (shown below) click the right arrow button to proceed to the next step.


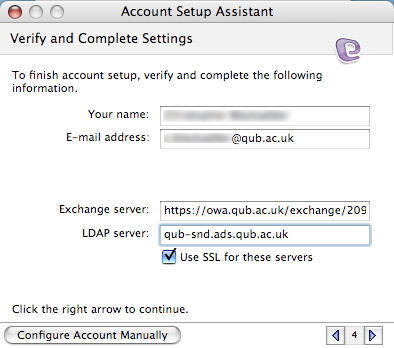
In step 4 of the ‘Account Setup Assistant’ dialog box (shown below) type your full name, your email address and Exchange server address:
https://owa.qub.ac.uk/exchange/123456@ads.qub.ac.uk
Substitute 123456 for your own staff number.
For the LDAP server address you can type: qub-snd.ads.qub.ac.uk
Click the right-arrow button at the bottom right to proceed to the next step.

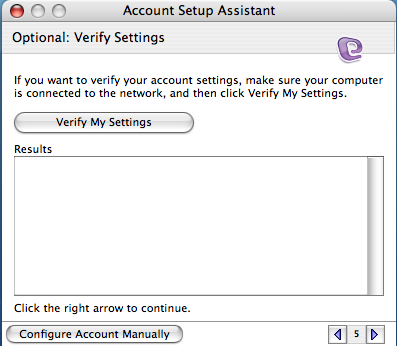
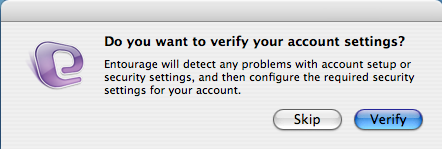
In step 5 of the ‘Account Setup Assistant’ dialog box (shown below) skip the verification and just click the right-arrow button at the bottom to proceed to the next step.

In the ‘Do you want to verify your account settings?’ dialog box click ‘Skip’

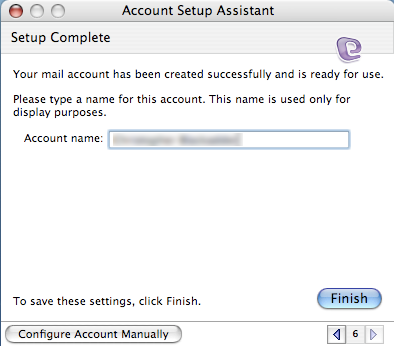
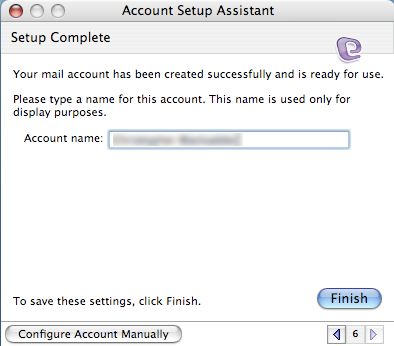
In step 6 of the ‘Account Setup Assistant’ dialog box (shown below) type a name to refer to this account e.g. your name. Then click ‘Finish’.

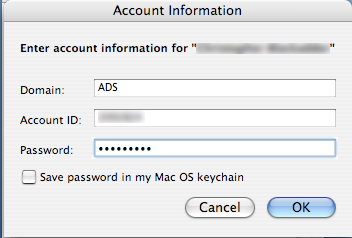
When asked for your QOL password enter it as follows (where the Account ID is your staff number) and click OK. The Domain is ADS.
You should now be able to use ‘Send and Receive’ and view email in your Inbox.

Exchange Offline Address Book Not Updating

Some users where complaining about the Offline Address Book being out-of-date. Checking the Event Viewer on the cluster node which creates the OAB showed the following error:

OALGen detected that the file ‘…..lzx’ is corrupted
or missing. This indicates data tampering or disk problems. Restore
files in this folder from the recent backup or clean up folder content
and force a full OAB generation. – Default Offline Address Book

So I ran:

Get-OfflineAddressBook | fl Name,Server,AddressLists,IsDefault,Guid

This gets the Guid for the Address Book which we use in:

Update-OfflineAddressBook <paste GUID here>

The Event Log showed another error and advised increasing the verbosity of error logs so I ran:

Set-EventLogLevel -id “MSExchangeSA\OAL Generator” -Level expert -verbose

I then ran the Update-OfflineAddressBook command again and this time there were extra information logs in the event log but the updated OAB was created.

Update-OfflineAddressBook <paste GUID here>

I checked that the OAB was being replicated out to the CAS servers.
A great post about Exchange OAB can be found here including a script to check for the staleness of the OAB.