If you’re in the School of Mathematics & Physics and your Mac is enrolled in the munki service then you can install the print queues with a single click using Managed Software Centre.
Printing on OS X is managed by a package called CUPS – the Common Unix Printing System. To add the MFD print queues we have to access this directly, rather than use the Printers & Scanners panel in System Preferences. You will require administrator privileges on the Mac to do this. You can either use the Generic Postscript driver which comes with OS X, or use the Xerox drivers which have added features such as booklet making. The Xerox drivers for whatever MFD you’re likely to use are available from Xerox support.
These instructions are suitable for use on a single machine – if you want to apply this to lots of Macs, you probably want to use a script.
We will be using the web browser interface to CUPS – this is disabled by default on OS X, so you should first enable it. In Terminal, run this command:
cupsctl WebInterface=yes
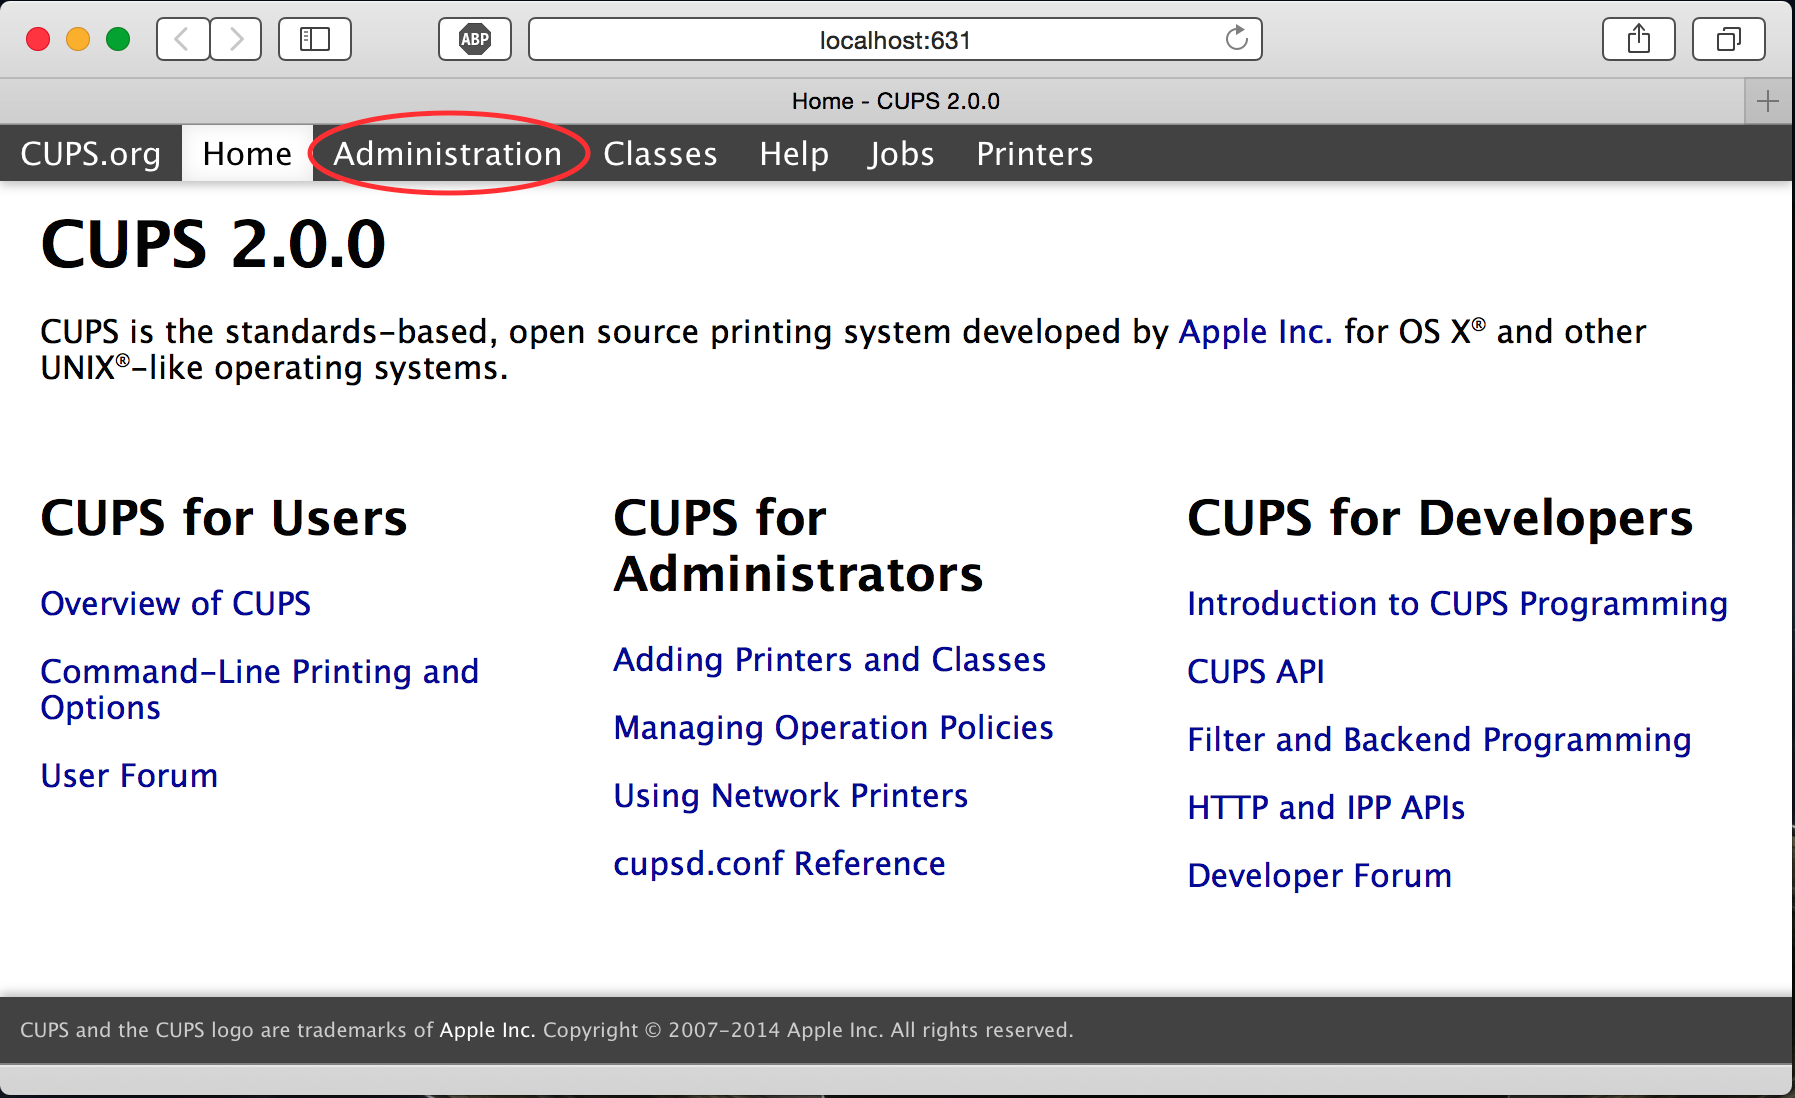
If you then open a web browser and access http://localhost:631/ you should see something like the screen below. Click on Administration and then Printers/Add Printer
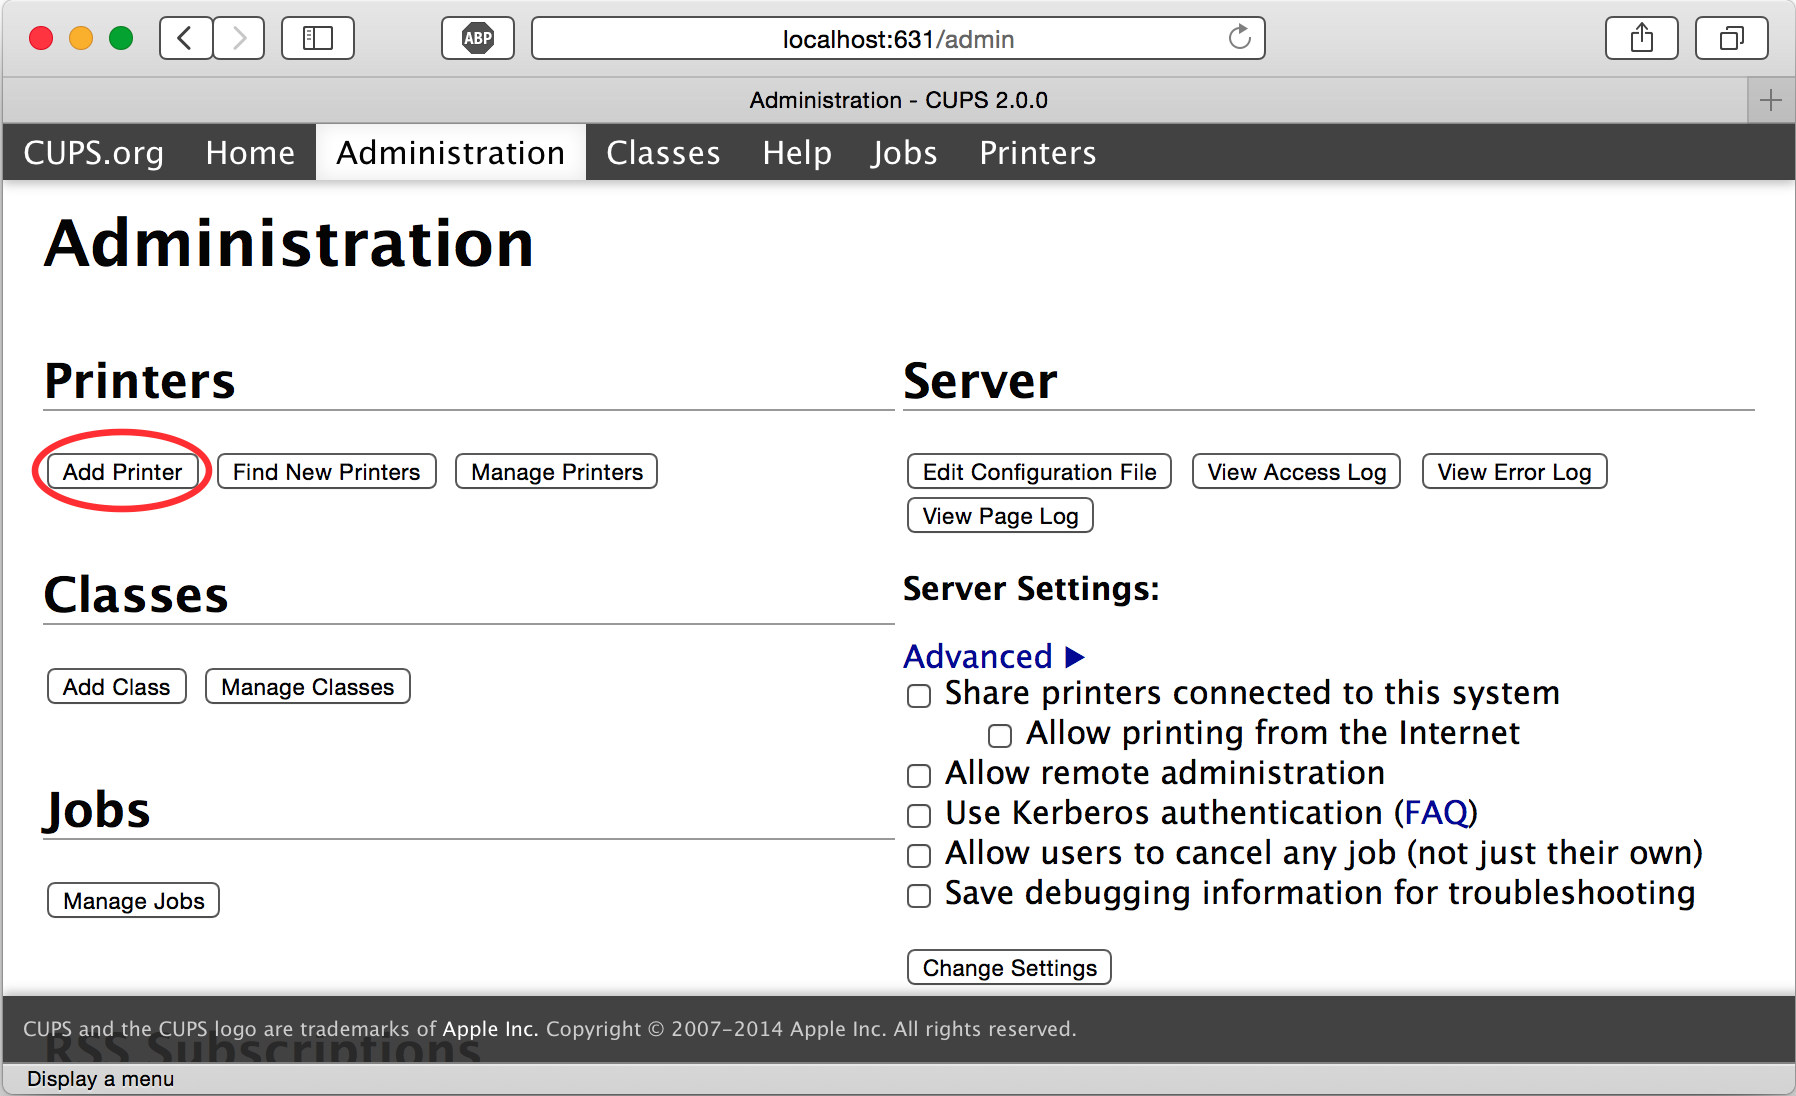
At this point you will be prompted for the Mac admin’s username and password. Enter these, and optionally store them in the Keychain. From the next screen, scroll to the bottom and select Windows printer via spoolss. 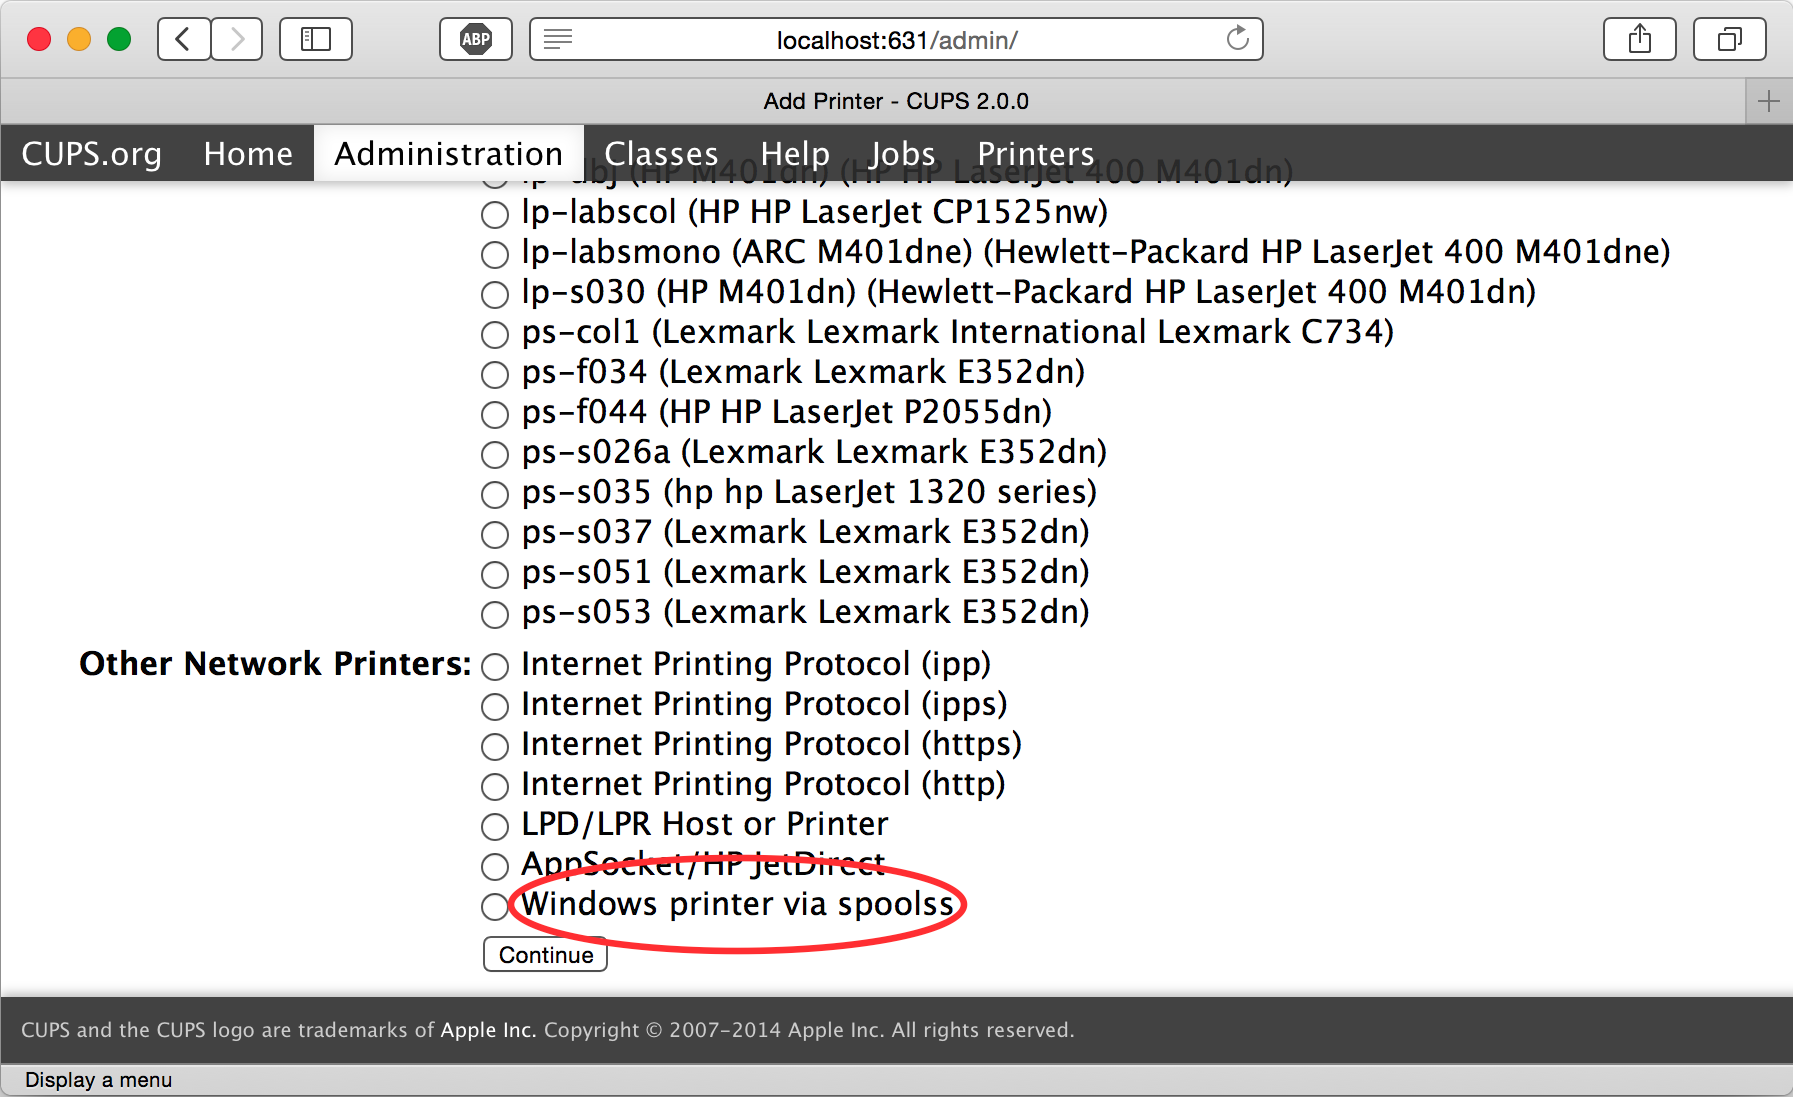
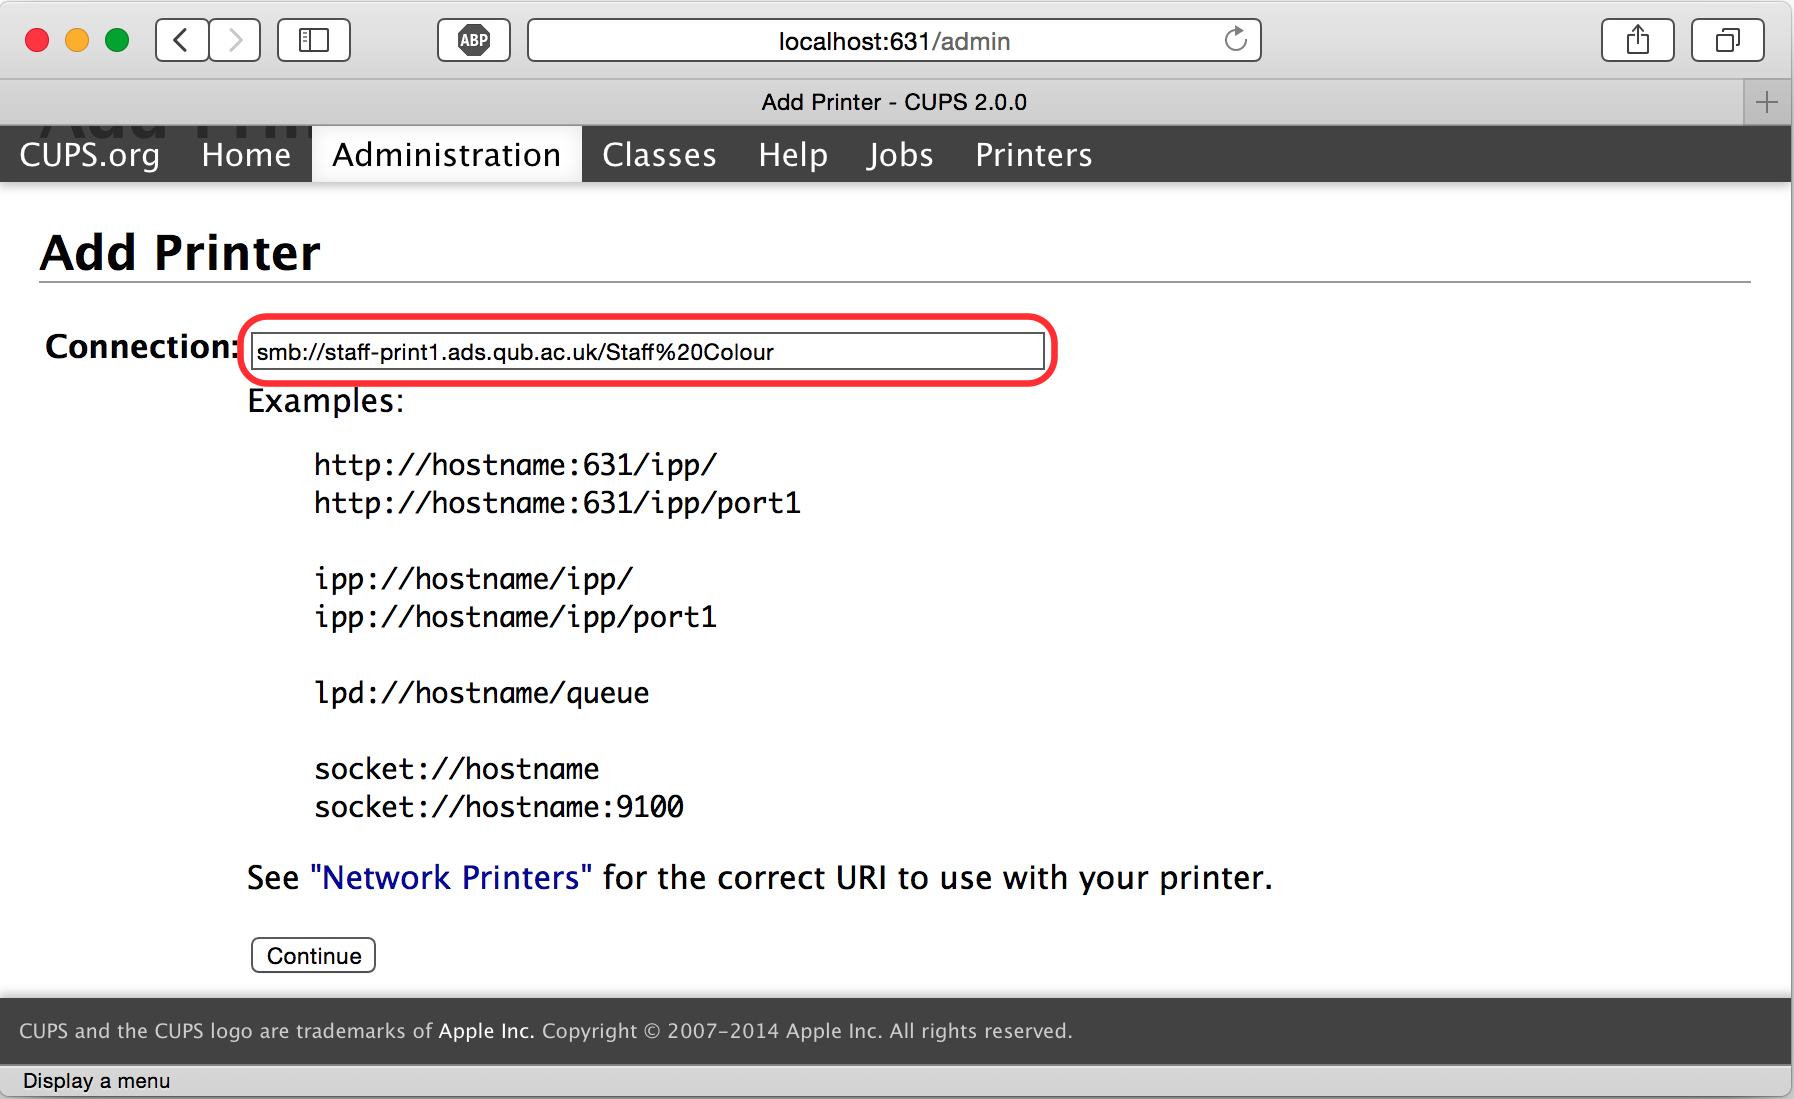
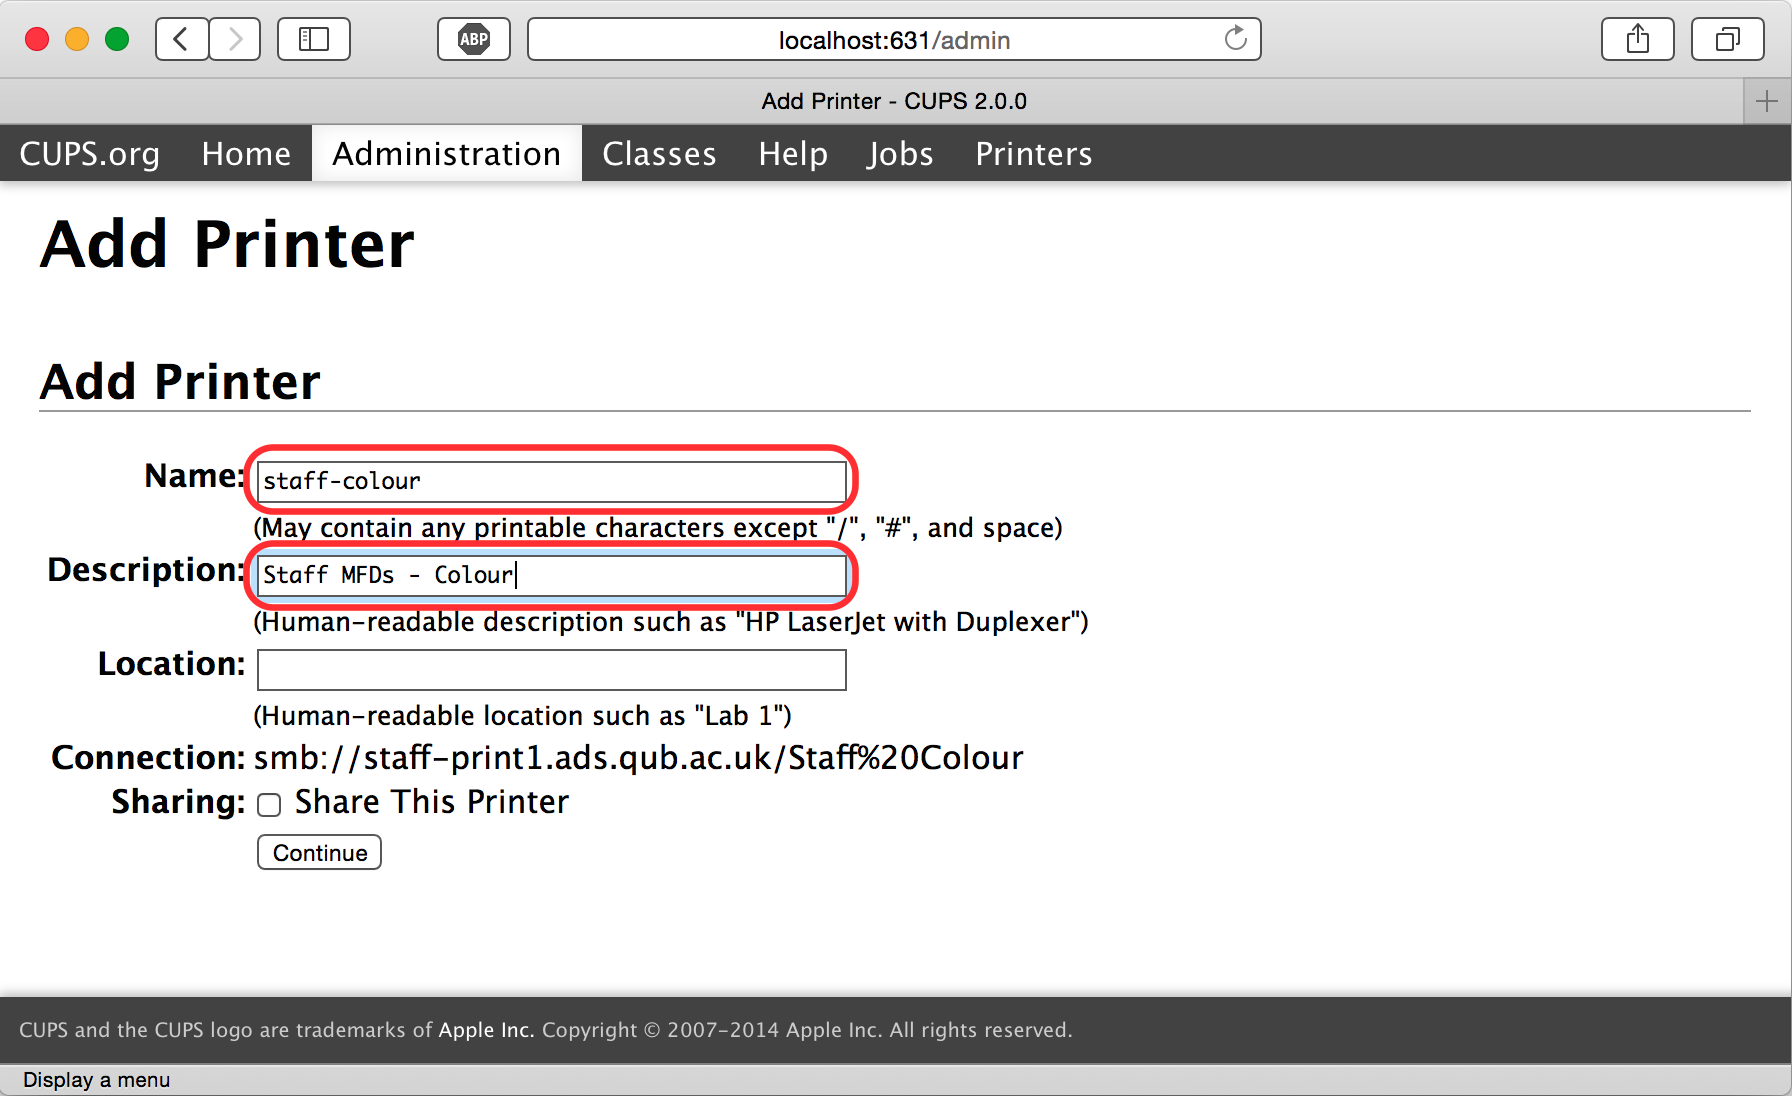
At Connection, enter the print queue address which you want to use:
Then provide a short ‘machine’ name for the queue, and optionally a more verbose description, which will appear in the Print dialog.
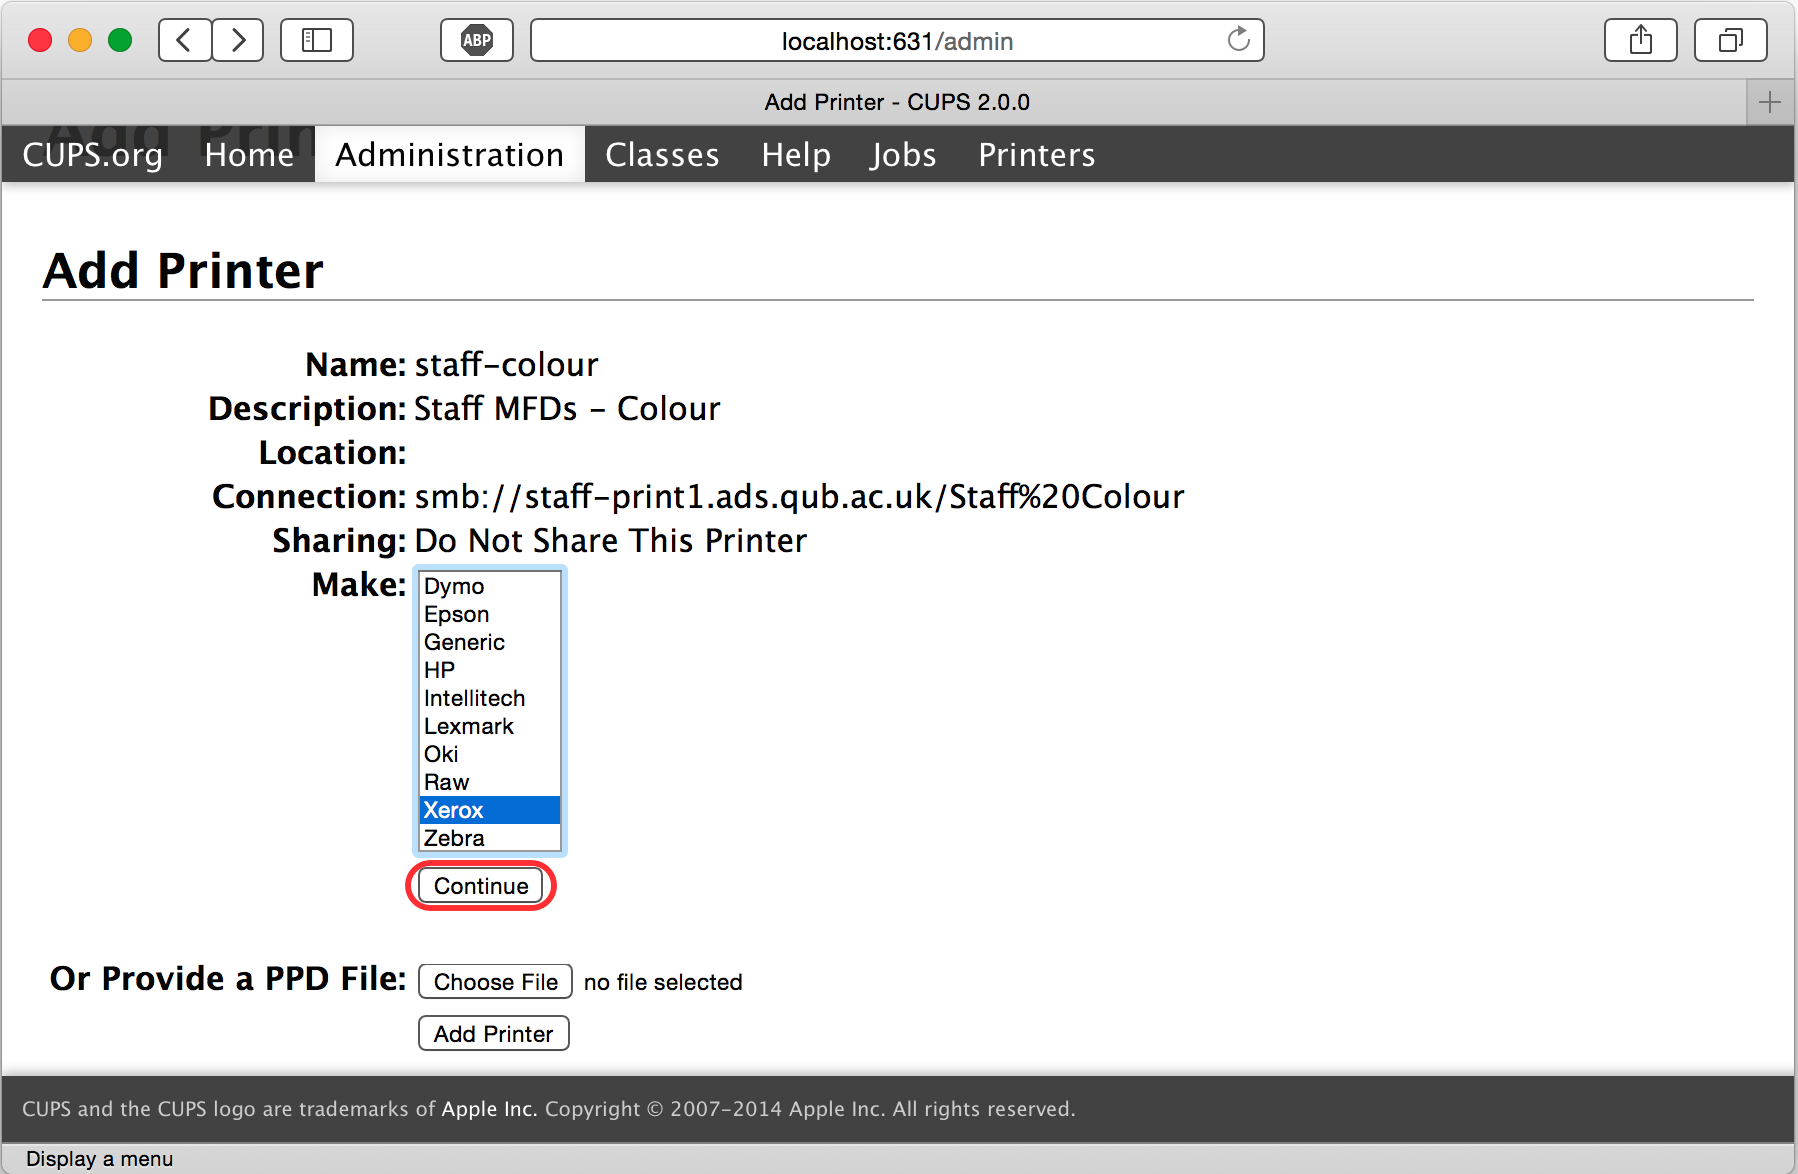
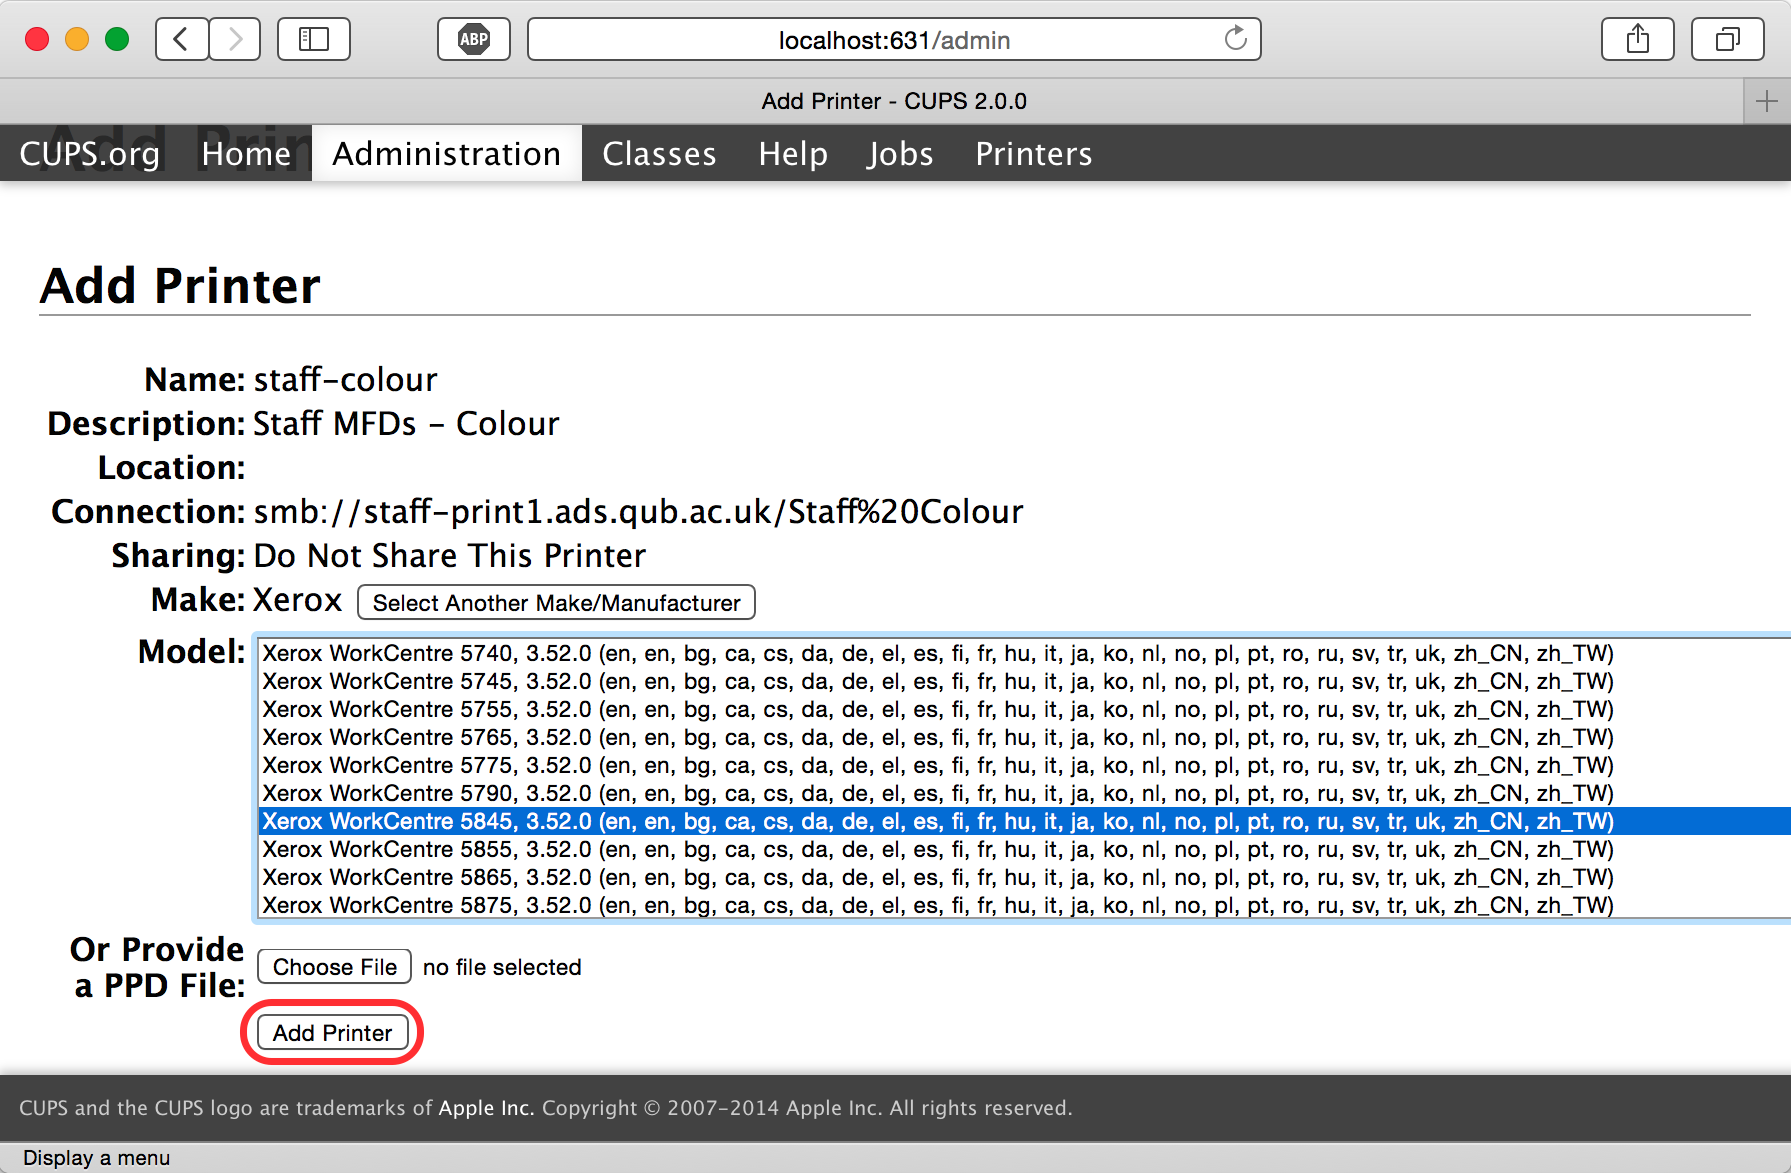
If you have installed the Xerox print drivers you can now select the model-specific driver, otherwise use the Generic Postscript one. Then click on Add Printer
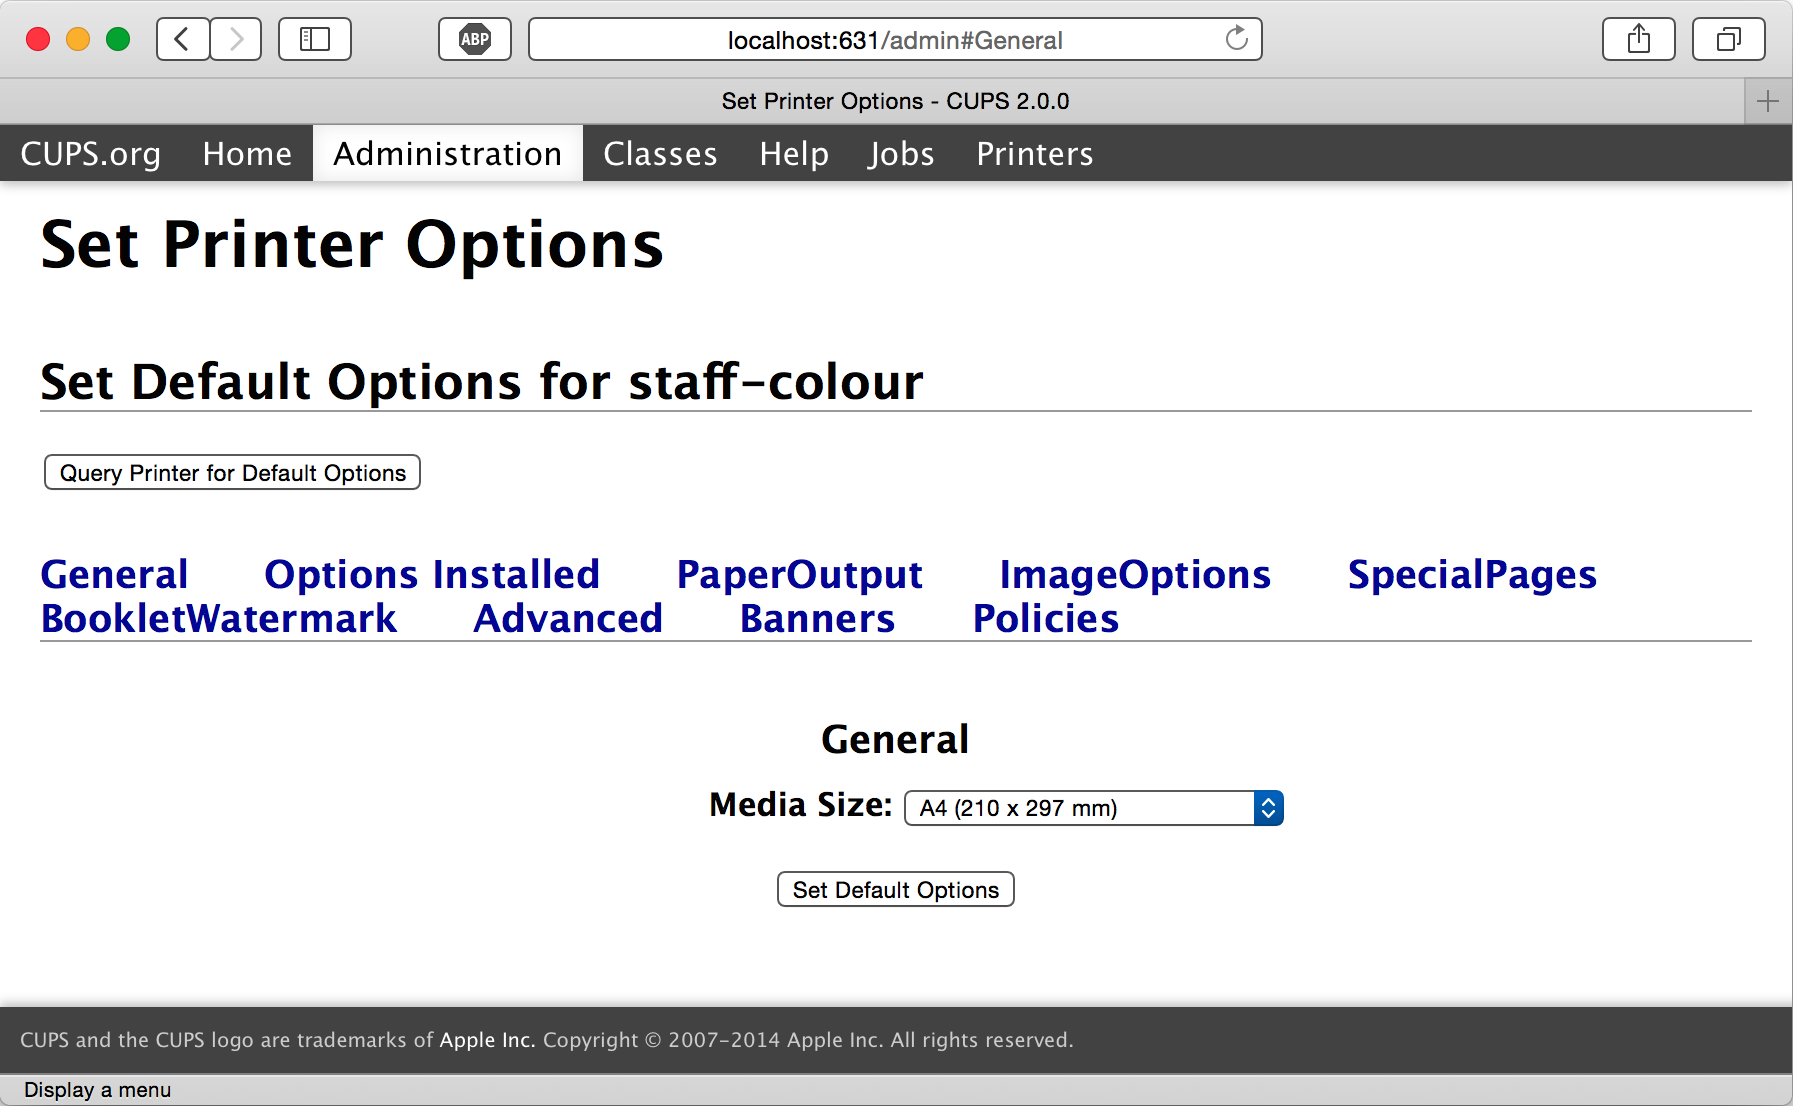
Finally you can set some defaults, such as A4 paper and duplex printing. If you are using the Xerox drivers you will see a lot of possibilities, but nearly all can (and should) be left alone! When done, click on Set Default Options and your print queue is now available.
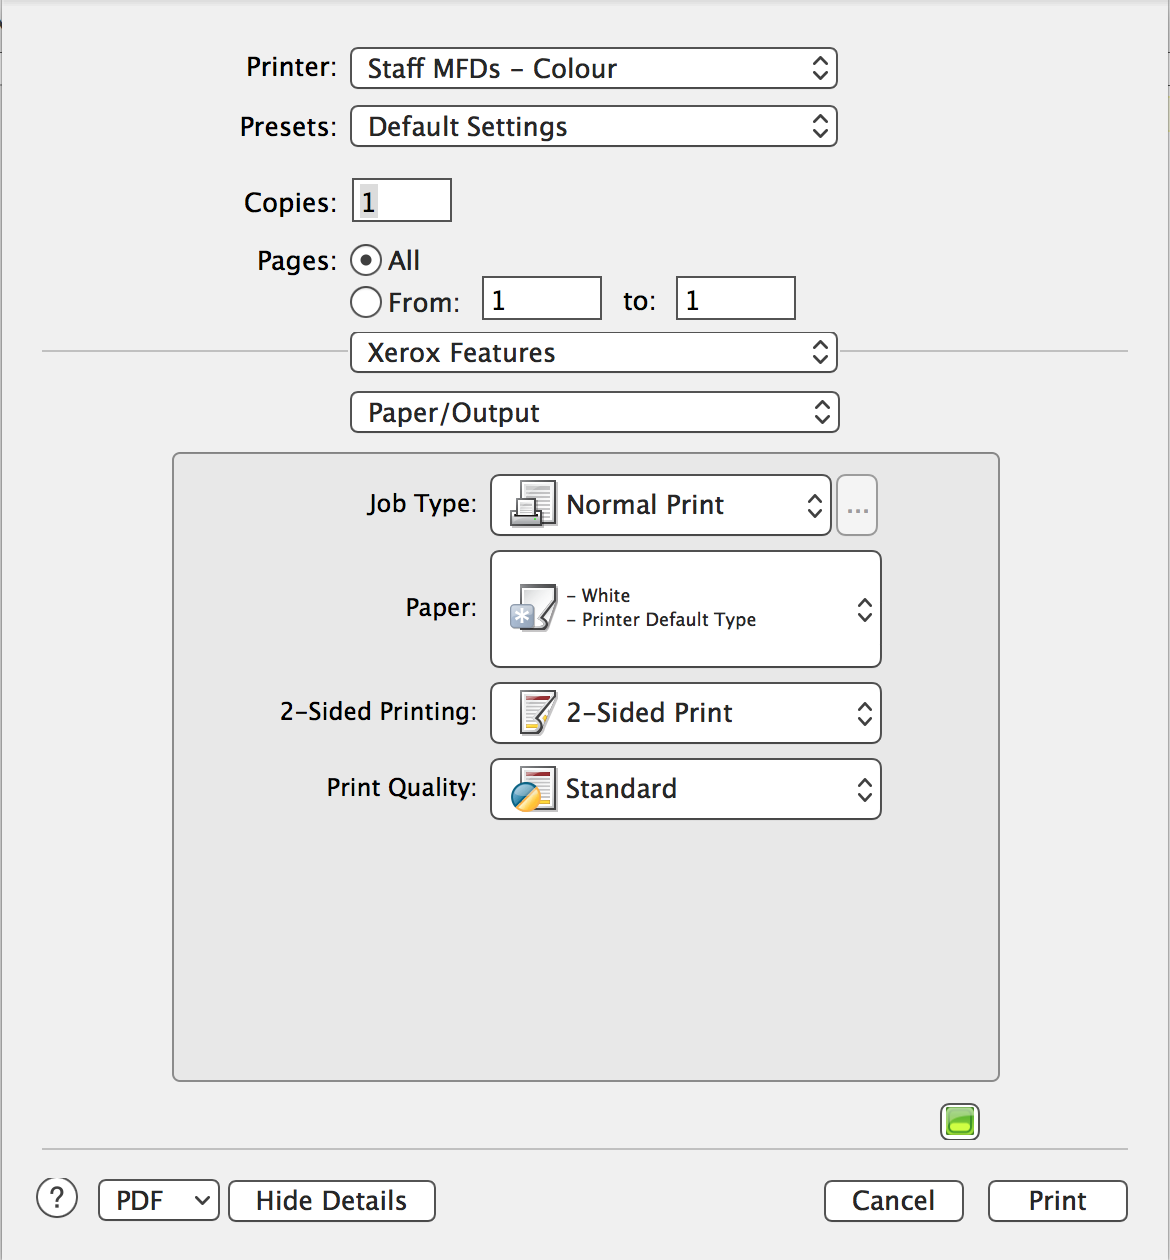
Now, open an application and print something. If using the Xerox drivers you will see a lot of options under the Xerox Features popup. Note that by default the Paper/Output options are set to double-sided, with Toner saver – the latter makes output look somewhat grey so you may wish to change to standard.
The print queue icon will appear in the dock, bouncing to get you attention. Open the print queue, and you will see that the print job is listed as Hold for Authentication. Click on the little ‘reload’ icon to the right, and you are prompted for your printing username and password – these are your QOL credentials, i.e.:
- Name: ADS\1234567 (your staff/student number)
- Password: Your QOL password

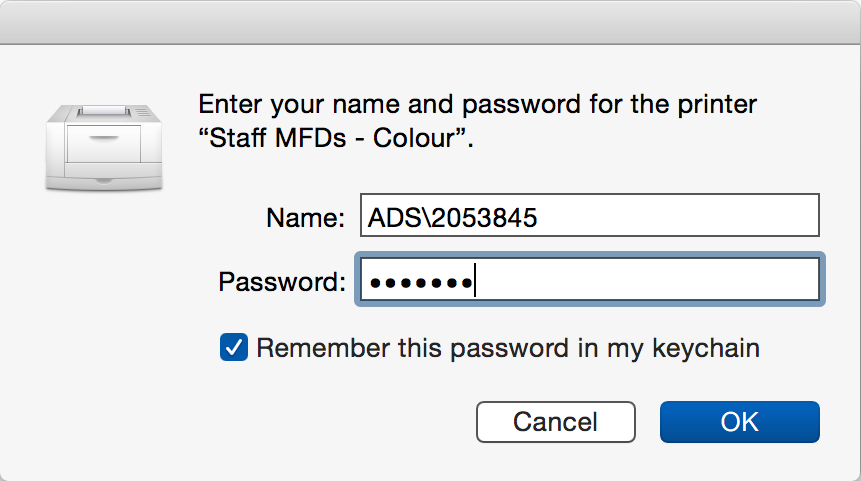
You’ll probably want to have those saved in the Keychain for later use. They are account-specific, so if you have multiple people using a Mac each will be prompted to enter their own QOL details in their account. Evidently, this is not going to work for a shared account, but those are best avoided for all sorts of reasons!
Once your credentials are accepted the job will disappear from the local print queue, and you can then go to your preferred MFD and release the job by logging on with your staff card.
Yosemite note
If you are running OS X 10.10 Yosemite, then you may encounter an issue where the print queue stalls, with an error showing up in the CUPS log about being unable to connect to the server. Inspecting the Console logs shows an error about smb: deny system-kext-load. To avoid this, the folks at JAMFnation suggest the following additional commands:
sudo sh -c 'echo "Sandboxing Relaxed" >> /etc/cups/cups-files.conf'
sudo launchctl stop org.cups.cupsd
sudo cupsctl DefaultAuthType=Negotiate
macOS Sierra note
macOS Sierra adds a new wrinkle to printing – even if you save your ADS credentials in the Keychain a dialog will pop up each time you print. It pre-fills the dialog with your user name and password so all you have to do is hit return (or click OK) but it’s tedious.
The best workaround I’ve found for this for this is to use NoMAD to perform an Active Directory bind for your account; this sets a Kerberos token which authenticates you to the print servers and avoids the need for any passwords. I’m testing this myself at the moment (Nov 2016) and it seems stable; I’ll try to put some documentation online in due course.
Update – December 2016. As of macOS 10.12.2 there is a new preference which allows you to revert to the previous behaviour.
The original version of these notes said that using sudo was necessary to run the cupsctl command – that was an error.
– RR