

Step 1: Open your Canvas course.
Step 2: Navigate to ‘Assignments’ in the Course Navigation menu.
Step 3: Click on the assignment to open it.
Step 4: Click on the ‘Start Assignment’ button ![]() .
.
Step 5: Click on the Panopto icon ![]() in the toolbar.
in the toolbar.
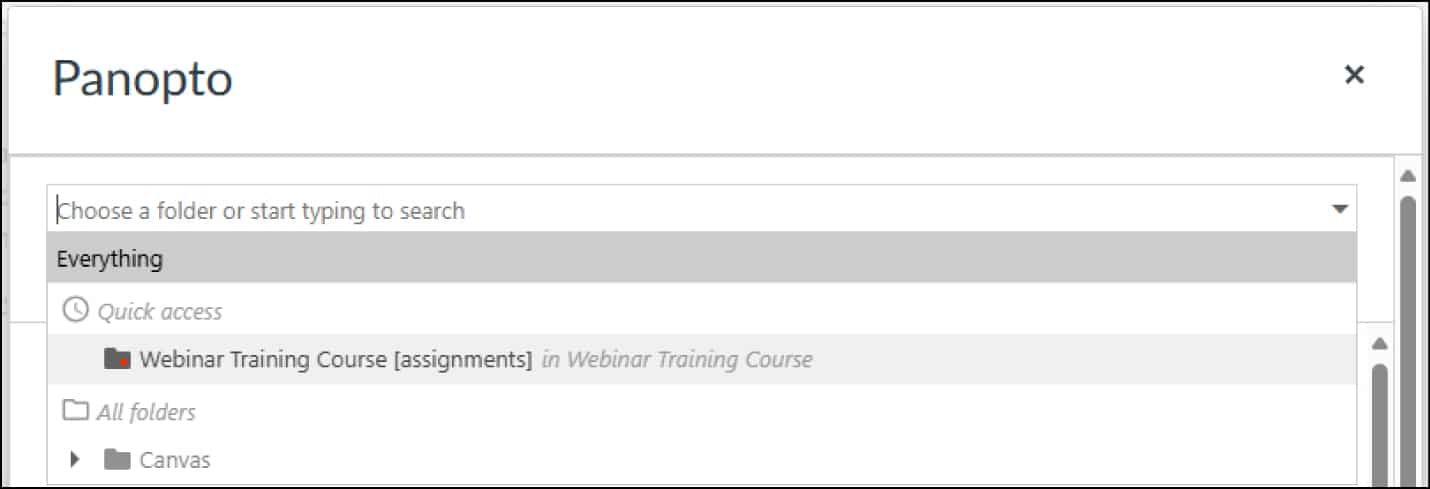
Step 6: A window will appear with three options: ‘Choose’, ‘Upload’ or ‘Record’. If your video already exists in an Assignment Folder, select the ‘Choose’ option.
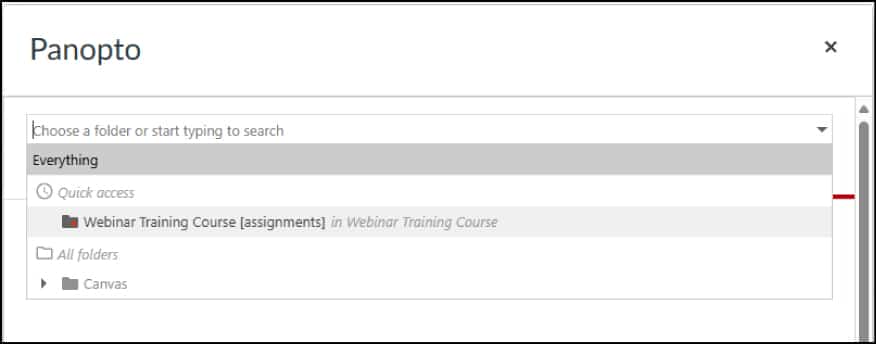
Step 7: Select the Assignment Folder from the drop-down menu (e.g., “HIS1001 [assignments]”).
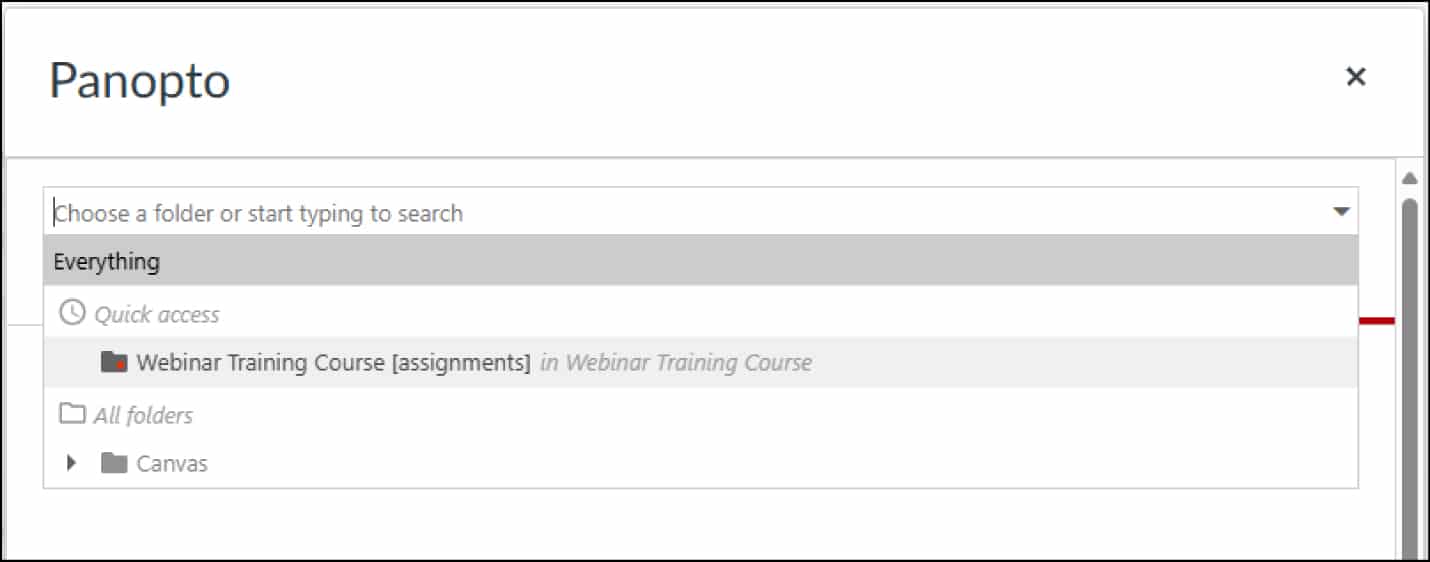
Step 8: Select the video you want to submit by clicking on the radio button to the left.
![]()
Click the 'Insert' button ![]() . Your video will now be embedded in the textbox (but not yet submitted).
. Your video will now be embedded in the textbox (but not yet submitted).
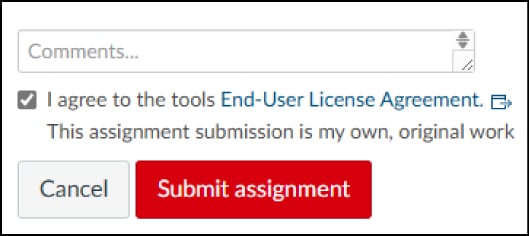
Step 9: Agree to the End-User License agreement and click on the 'Submit Assignment' button. You will receive a time-stamped confirmation message saying that your video assignment has been submitted. You will receive a time-stamped confirmation message saying that your video assignment has been submitted.
Step 1: Open your Canvas course.
Step 2: Navigate to ‘Assignments’ in the Course Navigation menu.
Step 3: Click on the assignment to open it.
Step 4: Click on the ‘Start Assignment’ button![]() .
.
Step 5: Click on the Panopto icon ![]() in the toolbar.
in the toolbar.
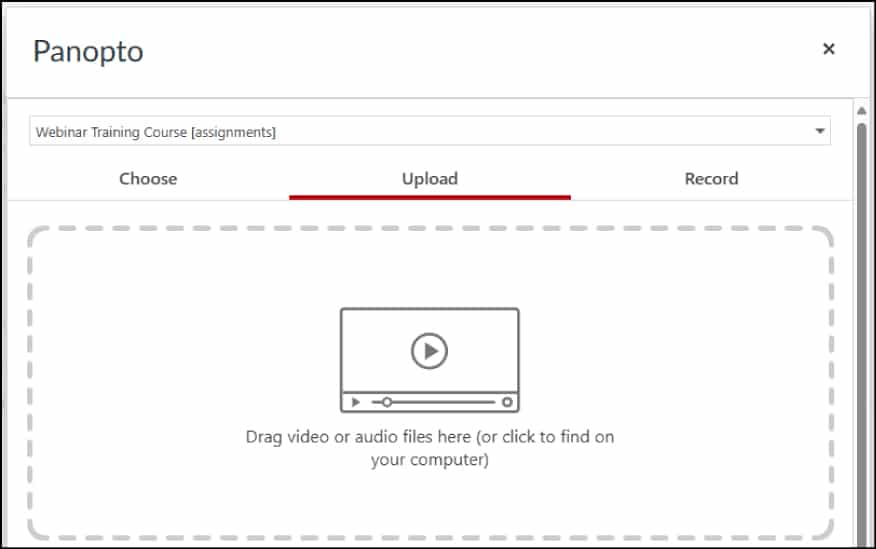
Step 6: A window will appear with three options: ‘Choose’, ‘Upload’ or ‘Record’. Select 'Upload' if you’ve already created a video on your phone, laptop, or tablet and want to upload it.
Step 7: Select the Assignment Folder from the drop-down menu (e.g., “HIS1001 [assignments]”).
Step 8: Drag and drop your file or click to locate it on your computer.
Step 9: The video will start processing (indicated by a green loading bar).
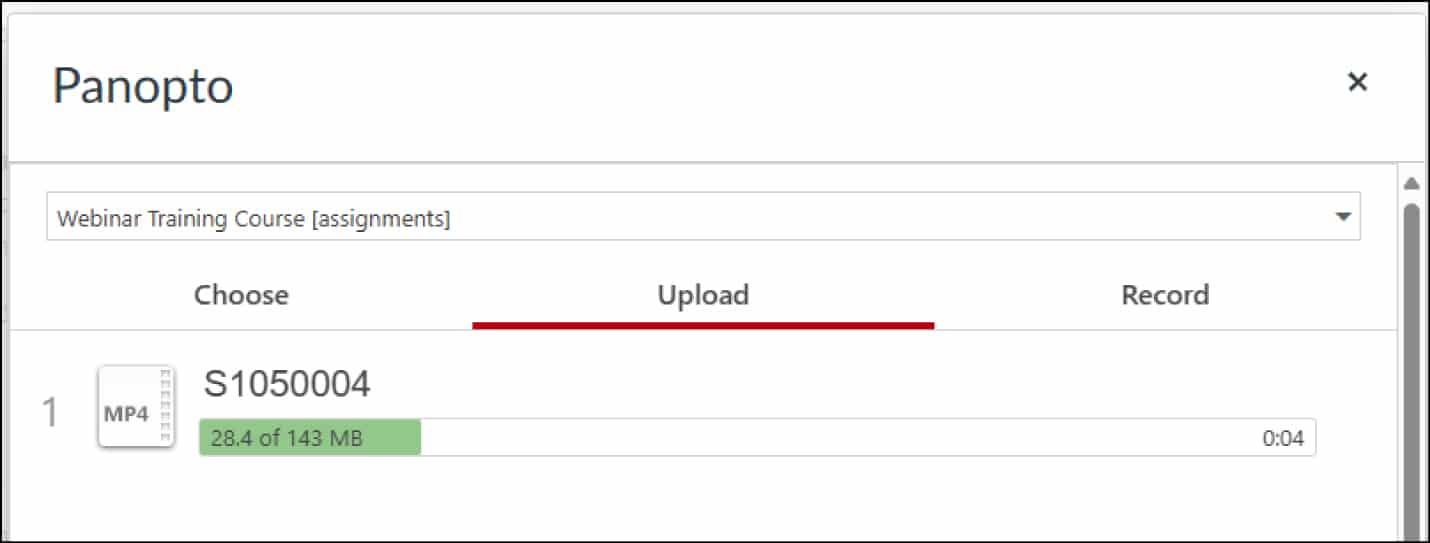
It is recommended that the title of your video includes your name, student number, and the name of the assignment for easy identification. You can easily change the title of your video while it's processing by clicking on the title, changing it, and pressing enter. Once the video has processed, you’ll see a green checkmark.

Step 10: Click the 'Insert' button ![]() to embed it.
to embed it.
Step 11: Agree to the End-User License agreement and click on the 'Submit Assignment' button. You will receive a time-stamped confirmation message saying that your video assignment has been submitted.
⚠️ Panopto Capture uses your internet connection to record and upload. If your home connection isn’t reliable, consider booking a room on campus to create your video.
Step 1: Open your Canvas course.
Step 2: Navigate to ‘Assignments’ in the Course Navigation menu.
Step 3: Click on the assignment to open it.
Step 4: Click on the ‘Start Assignment’ button ![]() .
.
Step 5: Click on the Panopto icon ![]() in the toolbar.
in the toolbar.
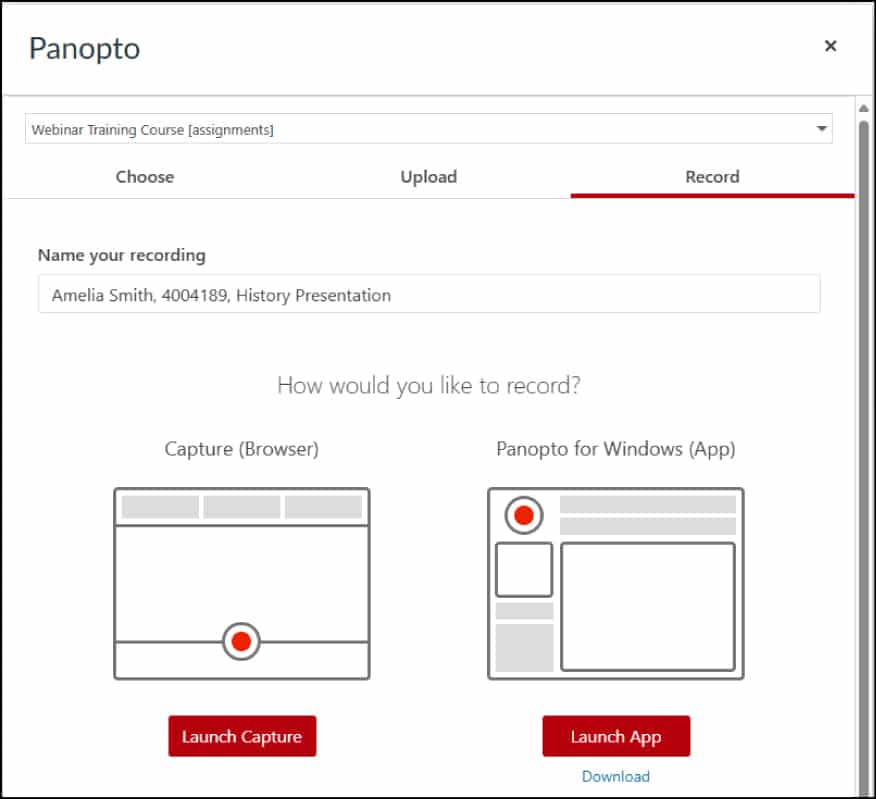
Step 6: A window will appear with three options: ‘Choose’, ‘Upload’ or ‘Record’. If you need to record a video from scratch, select the ‘Record’ option.
Step 7: Select the Assignment Folder from the drop-down menu (e.g., “HIS1001 [assignments]”).
Step 8: Provide a title for the recording (include your name, student number, and assignment title).
Step 9: Select the 'Launch Capture' button to open Panopto Capture in a new browser tab.
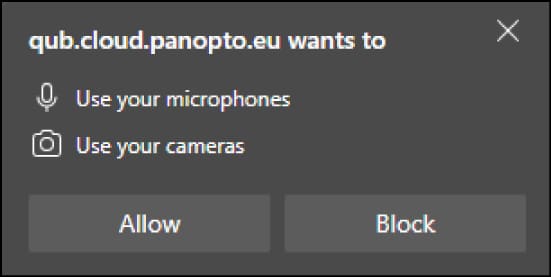
Step 10: Grant Panopto access to your camera and microphone if prompted.
Step 11: You can use the ‘Audio’ and ‘Video’ buttons at the top to modify or remove your audio and video sources. For example, you can turn your video off if you only want to record your audio. To share an additional source, such as a PowerPoint or your screen, click on ‘Screens and Apps’.
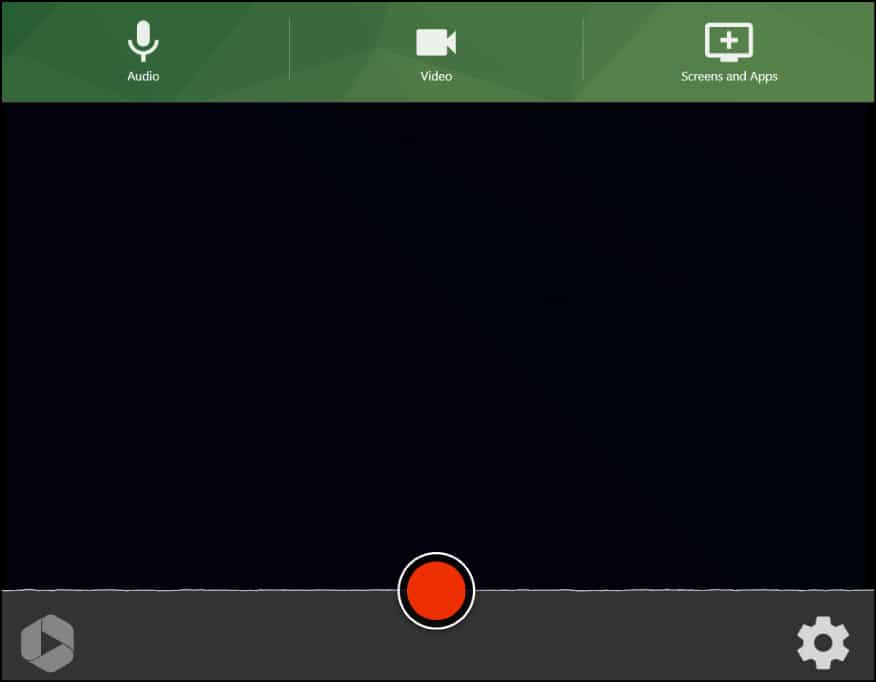
Step 12: Before you begin recording, test that your audio is working (look for sound wave movement).
Step 13: When you are ready to begin, click on the red 'Record' button  . There will be a 5-second countdown.
Step 14: Click the red 'Stop' button  when finished.
Step 15: A new window will load which shows the processing status in the top-left corner. While the video is processing, you can preview your video, edit your video, click on 'Redo' to start over, or click on 'Record New' to record additional content.
When the green bar is fully loaded, you can close this window. Note: Closing the window prematurely may result in the loss of your video.
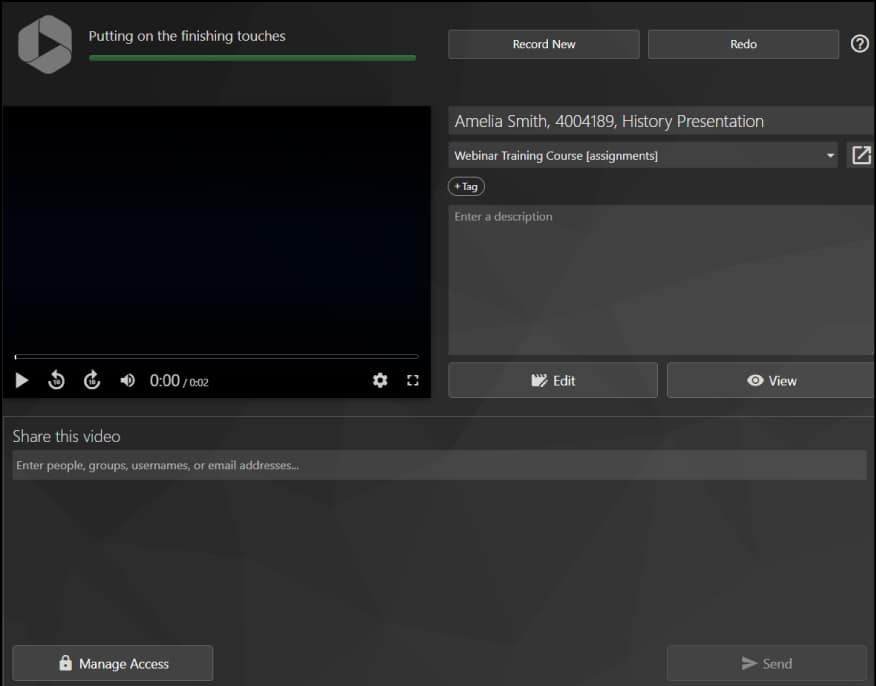
Step 16: Click on the 'Insert' button ![]() .
.
Step 17: Agree to the End-User License agreement and click on the 'Submit Assignment' button. You will receive a time-stamped confirmation message saying that your video assignment has been submitted.