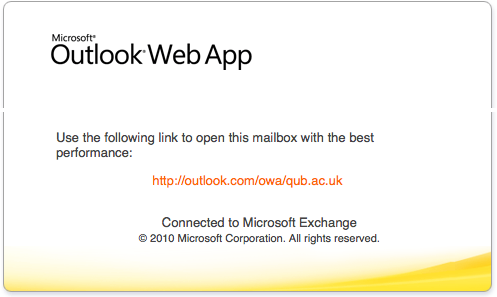
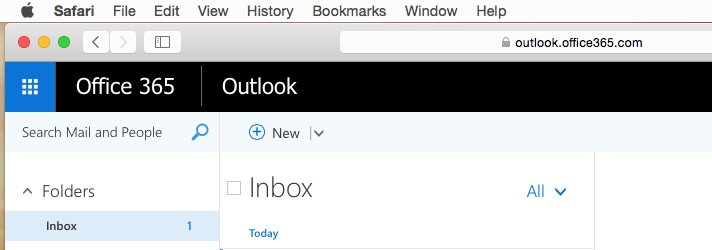
 Much (all undergraduate, some postgraduate) student email is now hosted by the Microsoft Office365 (henceforth O365) cloud service. You can tell if you’re using O365 if, after logging into the Qmail service, the server suggests you direct your browser to outlook.com instead of the Queen’s site (see left image). In addition the top left corner of your webmail will say Office365 in large friendly letters (though it does not tell you not to panic).
If you want to use Apple’s Mail with O365 you can via IMAP and SMTP, but it’s not entirely obvious how to do so – hopefully these notes will assist. Unfortunately the exact process tends to vary a bit with each release of Mail, so depending on what version of OS X you’re running the steps may be slightly different, but the basic process is similar.
1. Starting up
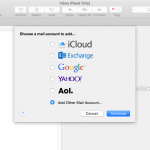 Open the Add Account dialog from Mail’s Preferences/Accounts section, and select Add Other Mail Account…
2. Your details
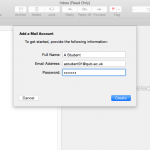 Provide your name, email address, and QOL password. After clicking Create you will see a message about manually configuring your account, and asking for more information.
3. Incoming server
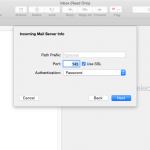 For the incoming mail server
- account type is IMAP
- mail server is outlook.office365.com
- user name is studentno@ads.qub.ac.uk – replacing studentno with your actual student number
- password is your QOL password
You may be asked for additional information on the incoming server. If so, the defaults are fine.
4. Outgoing server
For the outgoing mail server
- server name is smtp.qub.ac.uk
- username is your student number only
- password is your QOL password
Validation of the SMTP server details will often throw up an error – this is expected and can be ignored for now.
I’m not using the O365 SMTP servers here as they don’t deal well with QUB mailing lists, so it’s safest to use the QUB server instead.
5. Tweaking the setup
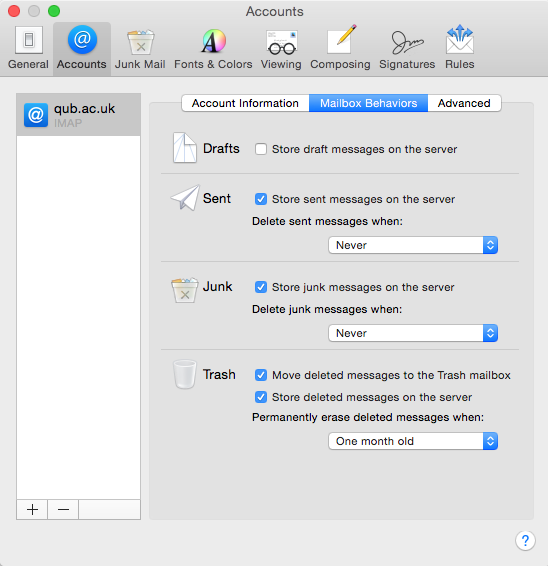
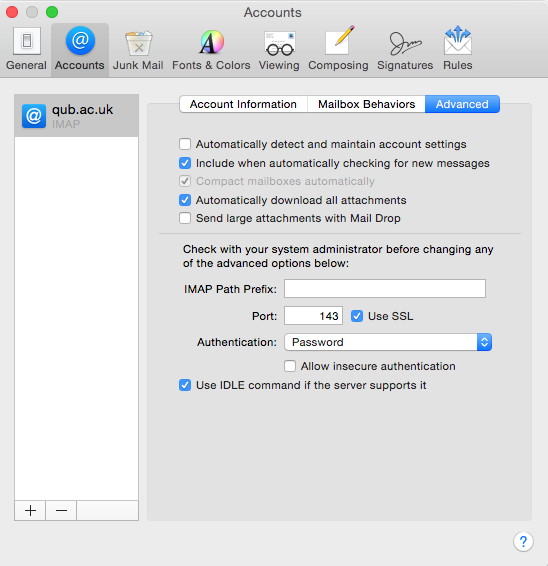
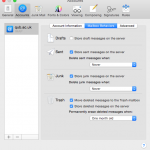
 When the account setup screen has disappeared, go to the Accounts tab in Preferences and click on the newly created account.
- Click on Mailbox behaviors and uncheck Store draft messages on the server – this rarely works well and causes intermittent hangs.
- Click on Advanced and uncheck Automatically detect and maintain account settings – this is also more trouble than it’s worth.
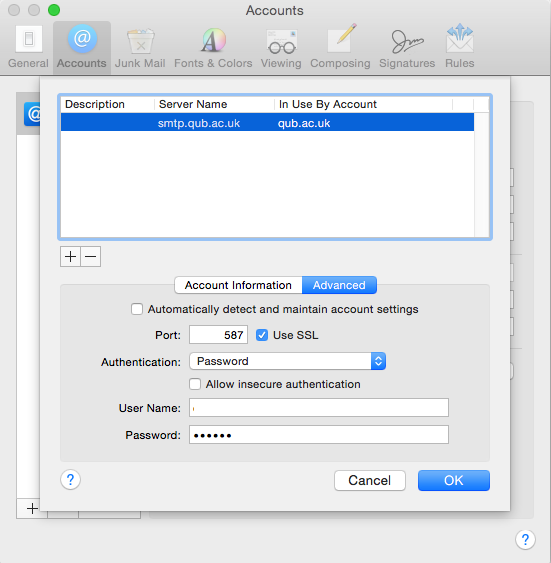
- Click on Account Information and from the Outgoing Mail Server (SMTP) popup select Edit SMTP server list…
- With the smtp.qub.ac.uk entry highlighted, click on the Advanced tab
- Uncheck Automatically detect and maintain account settings, and make sure the Port is set to 587, with SSL enabled
- Close the dialog boxes, opting to save changes to the account
You should now be able to send and receive email using Mail.app. You’ll want to click on the little Mailboxes button under the main toolbar to see all your mail folders.
One thing to be aware of – O365 webmail keeps sent and deleted email in folders called Sent Items and Deleted Items respectively. Mac Mail calls the same folders Sent Messages and Deleted Messages. Typically this means that sent and deleted items end up in different folders depending on which client you use, though recently I have seen Mail automatically use the Items folders – I am not sure if this is down to Mail being smart, or the O365 servers…